
Feature
Why the Indoor Fan Blows While the Condenser Stays Silent
By Mara Keene · HVAC Lens editorial · · 21 min read
- Published
- 2026-07-30
- Last revised
- —
- Filed under
- Feature
- Length
- 4,521 words
- Read time
- 21 min
- Review status
- Editorial
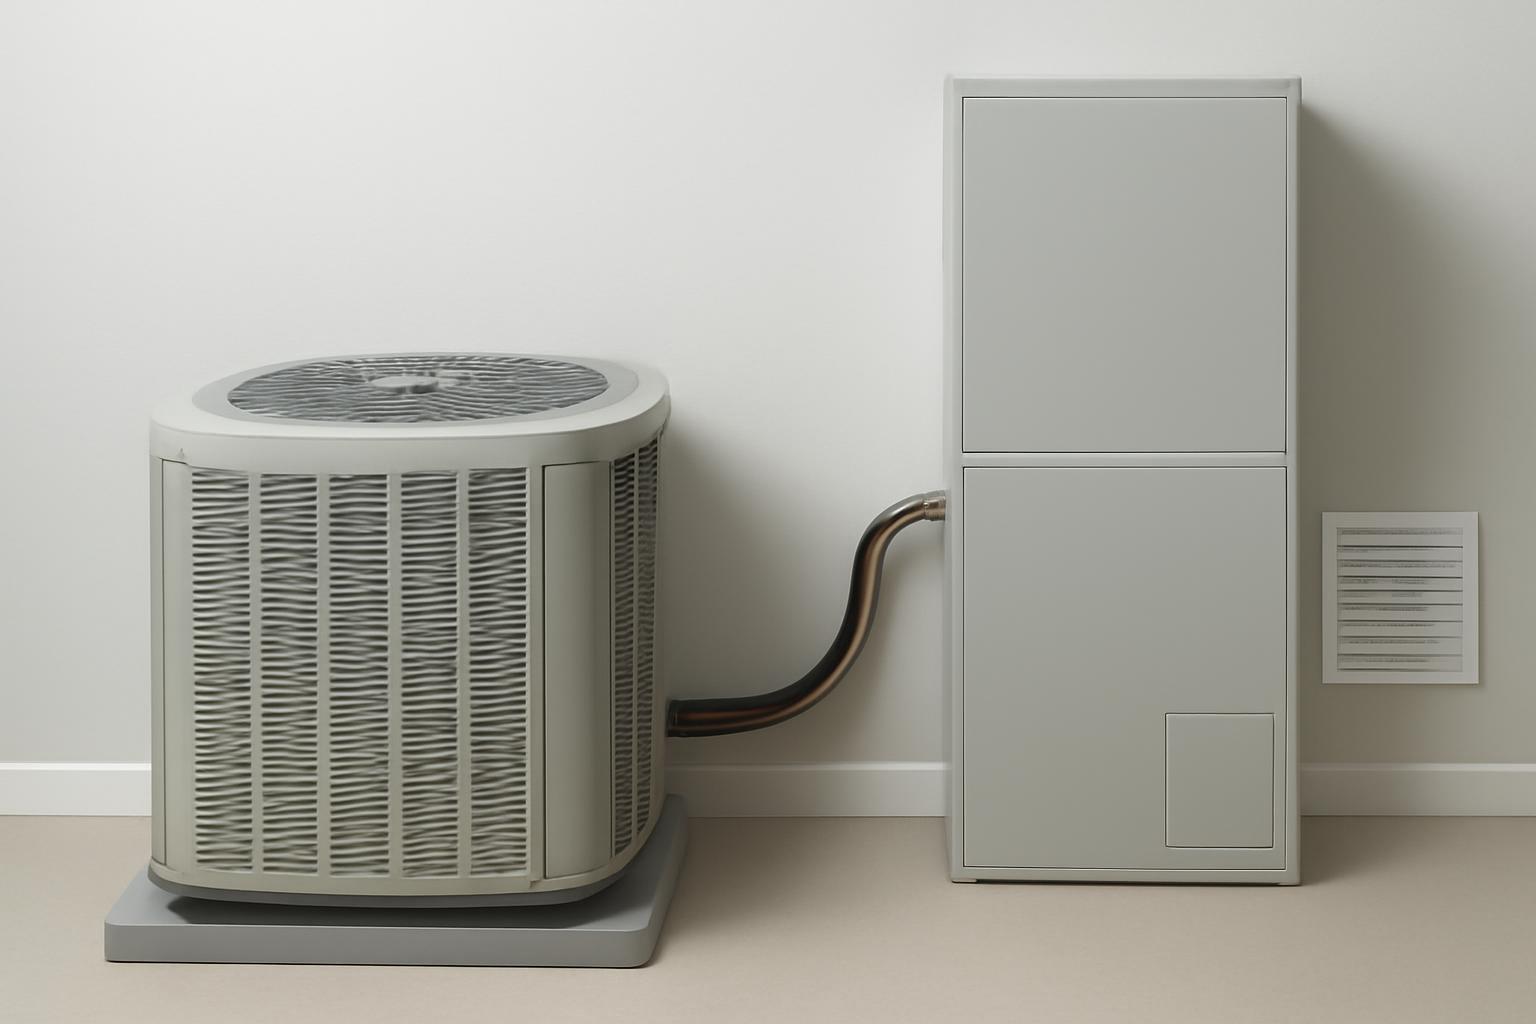
When an air conditioner is not running outside but air still comes from the vents, the explanation is usually straightforward: the indoor blower and outdoor condenser can operate through separate power circuits and controls. The blower may keep circulating room-temperature air even though the outdoor equipment has lost power, has not received a cooling command, has entered a protective shutdown, or cannot start because of an internal fault.
The safe goal is not to identify a capacitor, contactor, motor, or compressor by sound. It is to confirm that there is a genuine cooling request, complete a limited set of external checks, record what the system does, and recognize when professional testing is necessary.
Scope: This guide addresses a central air-conditioning system operating in cooling mode. Heat-pump behavior can differ by operating mode and model, so follow the applicable equipment manual when your system is a heat pump.
First confirm what is—and is not—running
The metal cabinet outside is generally called the outdoor condenser or condensing unit. It contains the condenser coil, a fan, electrical controls, and the compressor. Inside, an air handler or furnace blower moves household air through the duct system.
These sections must work together for normal cooling, but they do not necessarily start, stop, or receive power through the same circuit. The indoor blower may therefore run while the outside unit remains inactive. Indoor airflow proves only that the blower is moving air—not that the condenser has electrical power or has received the thermostat’s cooling signal.
During cooling, the system moves heat from inside the home to the outdoor condenser, where that heat is released. If the condenser is inactive, normal heat rejection and cooling decline or stop even though the blower can continue circulating air, as Lennox explains in its outdoor-unit troubleshooting guidance.
Start with the thermostat:
- Select COOL.
- Set the target temperature below the measured room temperature.
- Select AUTO for the fan.
- Replace the thermostat batteries if it uses replaceable batteries and the display is blank, weak, or behaving abnormally.
Leaving the fan set to ON can make it appear that the air conditioner is operating when it is only recirculating indoor air.
The duration is equipment-specific, so consult the thermostat and equipment manuals rather than assuming one universal delay.
From a safe distance, observe the outdoor unit without touching it:
- Is the entire unit silent?
- Is the outdoor fan stationary?
- Is there a hum, click, buzz, or brief startup attempt?
- Does the fan start and then stop?
- Does the cabinet sound active while the fan remains stationary?
A stationary fan does not prove that the entire condenser is unpowered. Likewise, total silence does not reveal whether the missing link is line power, a thermostat signal, low-voltage control power, or a safety switch.
These observations are clues for the next decision. They are not permission to reach through the grille, remove a panel, or try to move the fan blade.
Know the stop signs before troubleshooting
Turn cooling off if you see smoke, smell a burning odor, notice melted or visibly damaged wiring, hear loud electrical buzzing, or observe repeated failed startup attempts. Do not continue cycling the thermostat or breaker. These warning signs call for qualified evaluation rather than further homeowner testing, according to Beacon’s outdoor-unit safety guidance.
Apply a strict one-reset rule to the air-conditioning breaker. If the clearly labeled AC breaker is tripped, it may be reset once by moving it fully to OFF and then back to ON. If it trips again, leave the system off. Recurring trips can indicate excessive current, a short circuit, overheating, or another electrical fault; resetting the breaker does not repair the cause. Trane similarly directs homeowners to seek professional help when an AC breaker continues to trip.
Do not:
- Remove the condenser’s electrical or service panels.
- Open or dismantle the outdoor disconnect.
- Touch, move, or repair wiring.
- Reach through the fan grille.
- Bypass thermostat terminals or safety switches.
- Test energized circuits.
- Attempt to test or replace a capacitor or contactor.
- Handle refrigerant lines or open the refrigerant circuit.
- Attempt motor, compressor, or control-board repairs.
A capacitor can retain a hazardous electrical charge even after equipment power has been disconnected. Capacitor testing and replacement therefore belong to trained professionals, as this HVAC electrical-safety overview explains.
The same boundary applies to contactors, internal wiring, motors, compressors, control boards, and refrigerant components. Identifying one as a possibility is not the same as confirming that it failed.
HVAC Lens provides general homeowner information, not individualized diagnosis or contractor advice. Procedures vary by model and installation, so review the manufacturer’s instructions and obtain professional confirmation when they differ from general guidance. That limitation is also stated in the HVAC Lens terms.
Run this safe, no-tools checklist in order
Work through this sequence once. Its purpose is to distinguish an incorrect setting or visible external problem from an unresolved equipment fault without exposing you to internal electrical parts.
1. Verify the thermostat request
Confirm that the thermostat:
- Has a working display or another indication of power.
- Is set to COOL, not HEAT or OFF.
- Has a target below the measured indoor temperature.
- Has fresh batteries, if applicable.
You do not need to choose an arbitrary temperature difference. The essential point is to create an unambiguous request for cooling.
A normal-looking display does not prove that the thermostat is successfully sending the outdoor cooling signal. A thermostat, wiring connection, control board, or low-voltage circuit can still be at fault. At this stage, you are verifying only the settings visible to a homeowner.
2. Select FAN AUTO and wait
Set the fan control to AUTO. This reduces the chance that intentional blower-only operation will confuse the test.
Wait several minutes without repeatedly changing settings. Consult the thermostat or equipment manual if it describes a specific waiting period.
While waiting, listen from a safe distance. Record whether the condenser remains silent, clicks once, hums continuously, or attempts to start and stops.
3. Check the labeled AC breaker once
At the household electrical panel, identify the breaker clearly labeled for the air conditioner, condenser, or outdoor unit. Do not guess if the labeling is unclear.
If it appears tripped:
- Move it fully to OFF.
- Move it back to ON once.
- Return to the thermostat and allow for the normal startup delay.
If the breaker trips again—immediately or later—turn cooling off and stop. Do not reset it repeatedly. A second trip is useful diagnostic information for the technician.
Do not operate the panel if it shows scorching, visible heat damage, smoke, a burning odor, or abnormal buzzing. Those conditions fall under the stop signs above.
4. Inspect the outdoor disconnect area visually
The outdoor disconnect is commonly located near the condenser. From the outside, look for:
- An obvious OFF indication.
- An enclosure hanging open.
- Storm or impact damage.
- Scorching or discoloration.
- Exposed, loose, or visibly damaged wiring.
This is a visual inspection only. Do not open panels, replace fuses, or manipulate unfamiliar hardware based on generic instructions. Consult the unit manual before operating any disconnect, reset control, or fuse holder.
If the enclosure is open or damaged, wiring is exposed, or scorching is visible, leave the system off.
5. Check the filter and accessible airflow conditions
Inspect the normal homeowner-accessible filter. If it is visibly clogged, replace it with the correct type and orientation specified for the system.
A dirty filter can restrict indoor airflow and contribute to poor cooling or coil freezing. It does not, by itself, prove why a completely silent condenser is inactive. Treat filter condition as part of the overall picture rather than as a component diagnosis.
Also make sure ordinary supply registers and return grilles have not been unintentionally blocked. Do not open sealed air-handler or evaporator-coil panels to search for ice.
6. Look for visible condensate trouble
Cooling creates condensate at the indoor coil, and that water must drain away. Without dismantling anything, look for:
- Standing water near the indoor air handler.
- Water in an accessible auxiliary drain pan.
- An obviously elevated float switch.
- A condensate pump that appears full, overflowing, or inactive.
- An accessible drain opening that is visibly backed up.
A rising water level can activate a float switch intended to reduce overflow risk. Depending on the installation wiring, that switch may interrupt the outdoor cooling command or stop more of the system. This variation is why condensate-related shutdown guidance should not be interpreted as one universal switch arrangement.
Do not bypass the switch. Avoid generic drain-clearing or pump-disassembly methods unless the equipment manual provides a clearly applicable homeowner procedure for your installation.
7. Clear only loose exterior debris
Turn the equipment off before working near the condenser. Remove loose leaves, grass clippings, branches, or vegetation from the ground around the cabinet.
Do not:
- Reach through the grille.
- Insert an object to move the fan.
- Remove the top or side panels.
- Bend coil fins.
- Spray electrical sections.
- Perform deep coil cleaning without the applicable instructions.
Exterior debris can obstruct airflow, but removing it will not repair a lost power supply, missing control signal, or failed component. Aire Serv’s maintenance guidance likewise separates basic debris removal from electrical, refrigerant, and internal service work.
8. Make one controlled restart attempt
After completing the external checks:
- Confirm that panels and grilles remain intact.
- Set the thermostat to COOL.
- Set the target below room temperature.
- Leave FAN on AUTO.
- Wait through any normal equipment delay.
- Observe the outdoor unit from a safe distance.
If the condenser remains inactive, starts only briefly, produces an electrical warning sign, or trips the breaker again, end the test and request service. Do not keep repeating the sequence.
Use the outdoor unit’s behavior as a clue—not a diagnosis
The condenser’s behavior can narrow the problem category, but several failures can produce the same sound. Use the table to decide what to do—not to select a replacement part.
| Observation | Possible categories | Safe next action | Stop condition |
|---|---|---|---|
| Entire outdoor unit is silent | Lost line power, tripped breaker, disconnect trouble, missing cooling signal, low-voltage control fault, or activated safety switch | Verify settings, allow for a delay, check the breaker once, and inspect visible drainage and disconnect conditions | Unit remains silent after one controlled attempt |
| Unit hums but does not start | Capacitor, contactor, fan motor, compressor, wiring, or inadequate supply power | Turn cooling off and record whether the fan moved or startup was attempted | Continuous hum, loud buzzing, odor, or repeated attempts |
| Clicking or brief startup attempts | Relay response without sustained startup; possible power, control, motor, compressor, or protective-control problem | Stop cycling the thermostat and arrange testing | Repeated clicking, failed starts, or breaker trip |
| Fan is stationary but other outdoor sounds continue | Fan-motor, capacitor, control, obstruction, or fan-circuit problem; compressor may still be active | Turn cooling off | Operation continues without normal fan airflow |
| Breaker trips immediately or repeatedly | Overload, short circuit, overheating, supply-circuit fault, or internal equipment fault | Leave the system off after the single allowed reset | Any second trip |
| Ice is visible on an accessible indoor coil area or refrigerant line | Restricted airflow, dirty filter, refrigerant trouble, or control problem | Turn cooling off and inspect only the accessible filter | Persistent ice, water leakage, or repeat freezing |
| Cooling returns after a reset but later fails again | Intermittent power, control, safety, or component fault | Record the operating time and circumstances, then arrange service | Any recurrence or breaker trip |
Total silence
Total silence points first to a broad interruption: no line power, a tripped breaker, disconnect trouble, a missing thermostat command, failed low-voltage control power, or an active safety switch. It does not identify where the interruption occurs.
If the thermostat request is clear, the normal delay has elapsed, and the breaker remains on, further diagnosis requires electrical and control measurements.
Humming without startup
Humming means something may be energized or attempting to operate. A capacitor, contactor, fan motor, compressor, supply-power problem, or associated wiring may be involved.
A defective capacitor can interfere with motor startup, but humming alone does not confirm capacitor failure. Clicking, humming, and brief attempts can overlap across several components, as explained in Beacon’s troubleshooting guide.
Clicking or repeated attempts
A click may indicate that a relay or contactor is responding to a command. If sustained operation does not follow, the cause could still involve a startup component, motor, compressor, power supply, wiring connection, or protective control.
Repeated attempts do not provide a reliable homeowner diagnosis. End the test instead of continuing to cycle the thermostat.
A stopped fan with other activity
If the outdoor fan is stationary but the cabinet hums or otherwise sounds active, turn cooling off. The compressor may still be energized while normal airflow across the condenser coil is absent.
Do not try to start the fan manually or reach through the grille. The underlying problem may involve energized internal components.
Ice
If ice is visible, turn cooling off. Check only the accessible filter and ordinary airflow obstructions.
Restricted airflow can contribute to freezing, but refrigerant or control problems can also be involved. Ice indicates a condition, not a specific failed part.
Temporary recovery after a reset
A successful reset proves only that the system restarted at that moment. If cooling later fails again, the intermittent fault has not been shown to be resolved.
Record how long the system operated, the thermostat settings, and whether clicking, hard starting, short cycling, or breaker activity occurred before the shutdown.
Organize the likely causes into three diagnostic layers
A useful diagnosis proceeds through three layers. This avoids replacing an outdoor component when the real problem is missing power or a blocked control signal.
Layer 1: Missing power
The condenser needs line voltage from its dedicated supply circuit. That supply can be interrupted by:
- A tripped AC breaker.
- A disconnect problem.
- A damaged conductor or connection.
- A failure in the building’s electrical supply.
- Another interruption between the electrical panel and condenser.
The indoor blower may still operate because indoor and outdoor sections can have separate power circuits. Air from the vents therefore cannot confirm that the condenser is powered.
A visual inspection and one breaker reset are the homeowner limits. Confirming voltage at the supply circuit, disconnect, contactor, and equipment terminals requires suitable instruments and electrical-safety procedures.
Layer 2: Blocked command or safety signal
Even with line power available, the outdoor unit may not run unless it receives a valid cooling command through its low-voltage control circuit.
Possible interruptions include:
- Incorrect thermostat mode or setpoint.
- A thermostat fault.
- Damaged or disconnected low-voltage wiring.
- An indoor control-board fault.
- An activated condensate float switch.
- A freezing-related or pressure-related protective control.
- Another equipment safety input.
- A normal temporary startup delay.
A thermostat can display normally while the cooling signal fails somewhere downstream. Confirming the screen and settings rules out only obvious user-interface problems.
How a safety switch affects operation depends on the installation. A float switch may interrupt the compressor command, shut down more of the system, or interact with a control board. Bypassing it would remove a protective function while also obscuring the actual cause.
Layer 3: Failed outdoor component
If correct power and a valid control signal reach the condenser, the technician moves to outdoor components and wiring. Possibilities include:
- Contactor.
- Capacitor.
- Condenser fan motor.
- Compressor.
- Internal wiring or terminals.
- Related controls or protective devices.
The contactor is an electrically operated relay. A low-voltage cooling command causes it to switch higher-voltage power to outdoor components. It can fail mechanically or electrically, but a click—or the absence of one—does not confirm its condition.
When defective, it may contribute to weak starting, humming, or complete failure to start. The same symptoms can occur with a motor, compressor, contactor, wiring, or supply-power fault, so testing is necessary before naming the capacitor.
The condenser fan moves outdoor air across the coil. If the fan fails while other parts operate, heat rejection is impaired and protective controls may stop the system. That condition is different from an entirely silent, unpowered condenser.
Compressor trouble is one possibility when equipment hums, trips a breaker, or cannot sustain operation, but none of those observations confirms compressor failure by itself.
Refrigerant trouble should also be framed cautiously. It may contribute to freezing, poor cooling, or a protective low-pressure shutdown on systems equipped and configured for that response. It is not the default explanation for a completely silent outdoor unit.
These categories overlap. Voltage measurements, control-signal checks, and component tests are what separate missing power from a blocked command or failed component.
Understand indirect shutdowns: drainage, airflow, and ice
Not every inactive condenser begins with an outdoor electrical component. Indoor drainage or airflow trouble can sometimes interrupt cooling indirectly.
Condensate drainage and float switches
Moisture removed from indoor air collects at the evaporator coil and must drain away. If a drain blocks, a pump fails, or water rises in an auxiliary pan, a float switch may open the cooling-control circuit to help reduce overflow risk.
Whether that stops only the outdoor unit, the entire cooling system, or another combination depends on the installation. Visible standing water or a raised float is useful information, but it does not reveal whether the underlying cause is a clogged line, failed pump, displaced connection, or another drainage fault.
Limit homeowner action to observation unless the manufacturer’s instructions provide a clearly applicable maintenance process. Drain access points, pumps, traps, switches, and cleanout methods vary. Do not bypass the float to force the condenser to start.
Restricted airflow and a dirty filter
A clogged filter can reduce airflow across the indoor coil. Under some conditions, that can contribute to freezing and poor cooling.
However, a dirty filter is not reliable proof of why an outdoor unit is completely silent. If replacing a visibly clogged filter does not restore operation after the single controlled restart attempt, stop there. An electrical, control, safety, or component fault may still be present.
Exterior condenser obstruction
Leaves, grass, overgrown vegetation, and other debris can interfere with condenser airflow. Clearing loose material around the cabinet can improve the external airflow path.
That action cannot restore a missing power supply or thermostat signal, nor can it repair a failed relay, capacitor, motor, or compressor. If the fan is stationary, do not assume debris is the cause unless the obstruction is external and can be removed without reaching into the unit.
Ice and thawing
Visible ice calls for cooling to be turned off. Check the accessible filter, note where the ice appears, and leave the system off while arranging the next step.
If freezing returns after the ice is gone and the filter is clean, arrange professional diagnosis. Filters, blocked coils, refrigerant conditions, and other faults can all contribute to cooling and freezing problems, according to Trane’s troubleshooting material.
Decide who to call and what the technician will test
Arrange HVAC service when:
- The condenser remains inactive after the safe checklist.
- It hums or clicks but does not start.
- It repeatedly makes brief startup attempts.
- The fan remains stationary while other outdoor activity continues.
- Ice develops.
- Cooling returns only temporarily after a reset.
- You suspect a thermostat signal, safety control, contactor, capacitor, motor, compressor, or refrigerant problem.
- The breaker trips a second time.
- There is visible equipment damage or another electrical warning sign.
An HVAC company is a practical first call when the symptoms appear to involve the thermostat signal, safety controls, or internal air-conditioning components. If testing locates the problem in the household panel or building supply wiring, the HVAC company may recommend an electrician. For obvious panel-related symptoms, an electrician may be the more direct first call.
A professional diagnostic sequence may include:
- Verifying incoming supply voltage.
- Evaluating breaker and disconnect operation.
- Confirming whether a cooling command leaves the thermostat.
- Checking whether that command reaches the outdoor unit.
- Testing condensate and other safety switches.
- Inspecting low-voltage wiring and relevant control-board operation.
- Evaluating the contactor.
- Testing the capacitor with an appropriate instrument.
- Checking fan-motor and compressor behavior.
- Investigating refrigerant operation when the symptoms justify it.
These measurements are necessary because appearance and sound cannot distinguish all three diagnostic layers. The condenser can have line power but no control signal, or it can receive both while a component still fails to start. A professional sequence of power, signal, safety, and component checks is also outlined in this outdoor-unit diagnostic overview.
Do not attempt to reproduce those tests from an online checklist. Energized voltage measurements, thermostat-terminal bypasses, capacitor work, compressor testing, and internal electrical repairs fall outside the no-tools homeowner boundary.
A normal thermostat screen does not eliminate thermostat, wiring, or control trouble. Tell the technician what the display showed, but allow signal measurements to establish whether the cooling command traveled through the system.
Prepare a useful service handoff and reduce repeat problems
Clear observations can shorten the path to a defensible diagnosis. Copy this checklist into a note or service request:
- Thermostat mode: COOL / other
- Target temperature:
- Measured room temperature:
- Fan setting: AUTO / ON
- Thermostat display and batteries:
- Indoor blower: running / not running / intermittent
- Vent air: cool / room temperature / warm
- Outdoor unit: totally silent / humming / clicking / buzzing / brief attempts
- Outdoor fan: moving / stationary / starts then stops
- Visible ice: location and approximate extent
- Visible water: drain pan, floor, pump, or other location
- Odors: none / burning / other
- Visible damage: none / disconnect enclosure / wiring / cabinet
- Breaker status: not tripped / tripped once / tripped again
- Result of the single restart attempt:
- How long operation lasted, if it restarted:
Also record:
- When the failure began.
- Whether it followed a utility outage, storm, thermostat change, maintenance visit, yard work, or nearby electrical work.
- Whether cooling returned temporarily.
- Whether hard starting, short cycling, grinding, humming, or breaker trips occurred earlier.
- The filter’s condition and replacement date.
- Any recent drain, pump, electrical, or HVAC work.
- Whether the problem appears only under particular weather or operating conditions.
They are more useful than telling the company that the unit “probably needs a capacitor.”
For ongoing care:
- Keep loose vegetation and debris away from the condenser.
- Inspect and replace the filter according to the equipment instructions and the home’s actual conditions.
- Keep ordinary registers and returns unobstructed.
- Address recurring water, ice, sounds, or breaker behavior instead of repeatedly resetting the system.
- Arrange periodic professional maintenance appropriate to the equipment.
It cannot guarantee prevention of every control, motor, compressor, or supply-circuit failure.
After diagnosis, ask:
- Which layer failed: power, control or safety signal, or outdoor component?
- What measurements confirmed the finding?
- Was the observed symptom a cause, a protective response, or a consequence?
- Did the technician find any related airflow, drainage, or electrical condition?
- What model-specific maintenance is appropriate going forward?
That is the homeowner-first purpose of HVAC Lens: understand the system well enough to report useful clues and avoid speculative internal repairs. The site’s About page likewise frames the goal as making maintenance calls and contractor conversations easier to understand—not turning homeowners into technicians.
The decision rule is simple: verify the cooling request, select FAN AUTO, wait for any normal delay, check the breaker once, and inspect only accessible external conditions. Then stop. If the condenser remains inactive, restarts only briefly, trips the breaker again, or shows electrical warning signs, leave it off and give a qualified professional your observations. The objective is to identify the problem category and communicate clearly—not to guess at or replace an internal component.
Frequently asked questions
Why is the inside AC running when the outside unit is not?
The indoor blower and outdoor condenser may use separate electrical circuits and control paths. The blower can circulate household air because the thermostat is set to FAN ON, because the indoor equipment has power while the condenser does not, or because the outdoor cooling signal has been interrupted.
Set the thermostat to COOL, choose a target below room temperature, select FAN AUTO, and wait several minutes. If the outdoor unit remains inactive, complete the external checklist once and arrange service if the problem persists.
Can I reset the AC breaker if the outdoor unit is not running?
Yes. If the breaker is clearly labeled for the air conditioner and appears tripped, move it fully to OFF and then back to ON once. Allow time for any normal startup delay afterward.
If it trips again, leave the system off. Do not keep resetting it. A recurring trip can indicate an overload, short circuit, overheating condition, supply-circuit problem, or internal equipment fault that requires testing.
Does humming mean the AC capacitor is bad?
No. A failed capacitor is one possible cause of humming without startup, but the contactor, fan motor, compressor, wiring, or supply power may also be involved.
Sound cannot confirm capacitor failure. End the cooling attempt if the unit hums without starting, and have a qualified technician test the circuit and components. Do not open the condenser or handle the capacitor because it may retain a hazardous electrical charge after power is disconnected.
Can a condensate float switch keep the outdoor AC unit from starting?
Yes. Rising water in a drain pan or pump arrangement can activate a float switch that interrupts cooling. Depending on the installation wiring, it may stop the outdoor cooling command, shut down more of the system, or affect operation in another way.
Look for standing water or an elevated float without dismantling anything. Do not bypass the switch. Visible water identifies a useful diagnostic direction but does not establish whether the cause is a clogged drain, failed pump, displaced connection, or another drainage problem.
Should I call an HVAC technician or an electrician for a non-running condenser?
Start with an HVAC company when the problem appears to involve the thermostat signal, safety controls, contactor, capacitor, condenser fan, compressor, refrigerant circuit, or another internal HVAC component.
If the fault appears to originate in the household panel or building supply wiring—particularly when the panel itself shows warning signs or the problem is clearly outside the HVAC equipment—an electrician may be the appropriate first call. Either professional may recommend the other after testing locates the fault boundary.