
Residential Furnace Thermocouple: Diagnosis, Testing, and Replacement
A furnace thermocouple is the gas-safety device in an older standing-pilot furnace. The pilot flame heats its tip, and that heat produces a small millivolt…
By Mara Keene · · 19 min read
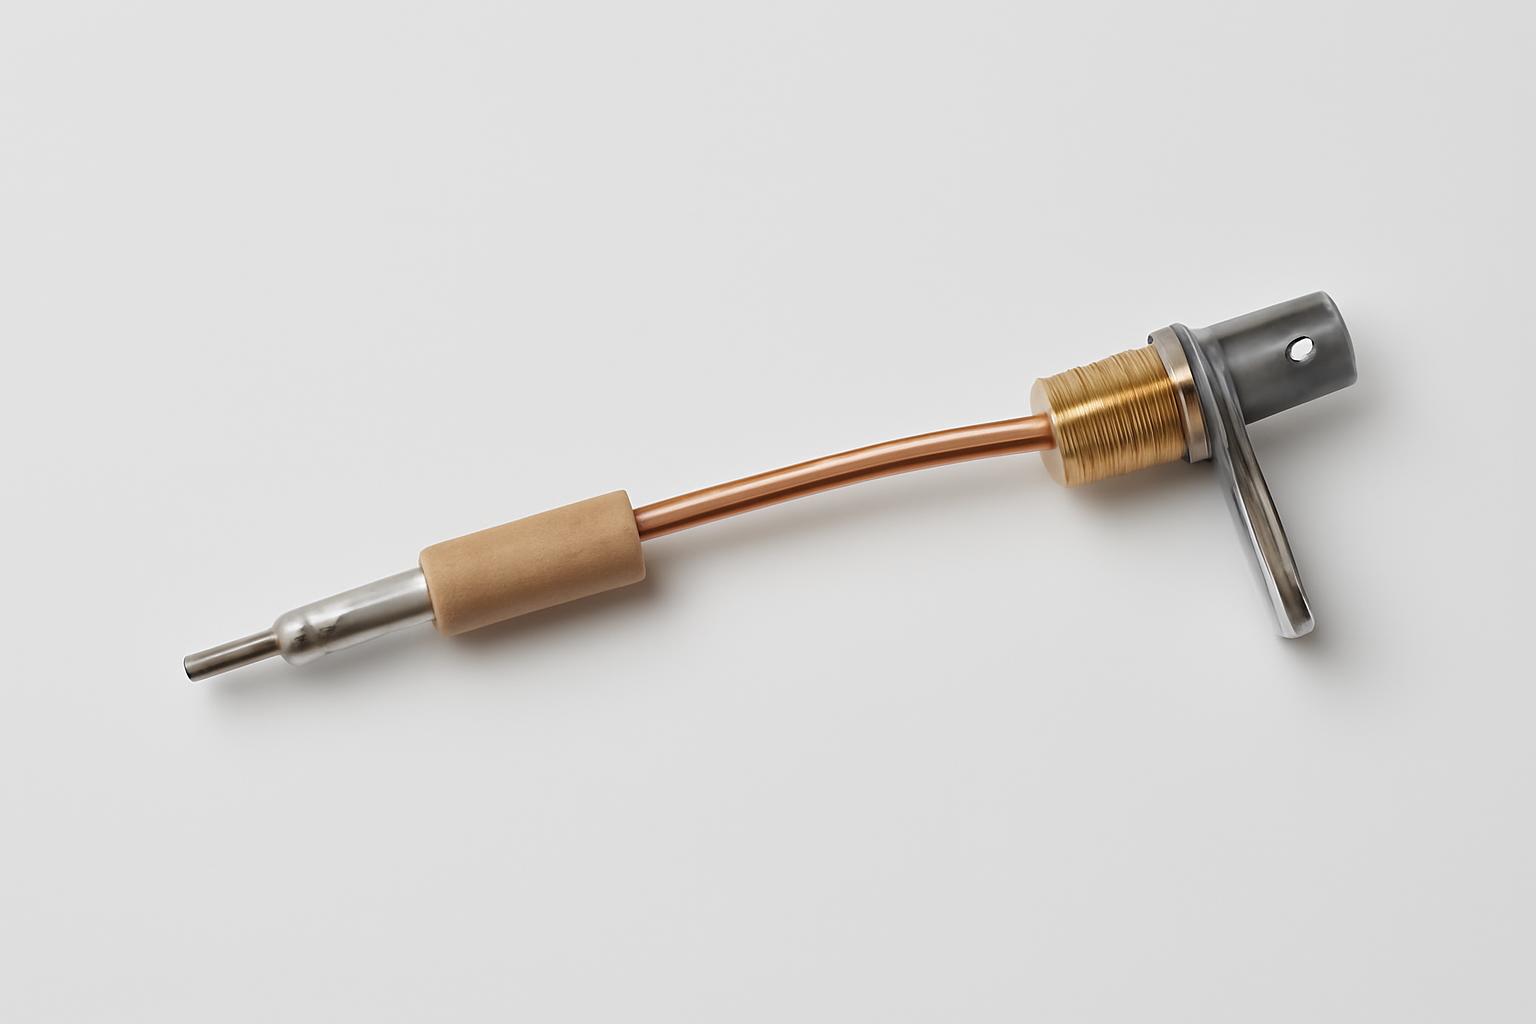
Overview
A furnace thermocouple is the gas-safety device in an older standing-pilot furnace. The pilot flame heats its tip, and that heat produces a small millivolt voltage that holds the gas control’s safety valve open. If the pilot goes out, the voltage disappears and the valve closes, shutting off the gas. Whether this guidance applies to you depends on one thing: your furnace must actually have a standing pilot with a thermocouple, and many newer furnaces do not.
Home Depot’s replacement guide describes the same function in plain terms: thermocouples are designed to detect a pilot light’s loss of heat and close the gas valve to prevent a gas leak. Resideo’s technical documentation for its Q390 thermocouples confirms the mechanism, stating that as long as the pilot flame is present, the millivolt output from the thermocouple keeps the safety valve in the gas control open, allowing main gas to flow on demand.
That safety role explains the classic symptom. When the thermocouple is dirty, misaligned, or failing, the gas control never receives a strong enough signal, so the pilot dies the moment you release the control knob. Before you clean anything or buy a part, though, two clarifications matter. First, not every furnace uses this component, so confirm what you have. Second, the phrase “furnace thermocouple” also describes industrial high-temperature measurement probes, which are a completely different product with a different job. This article covers the residential safety device, walks through symptom-based diagnosis, and helps you decide between cleaning, model-specific testing, replacement, and calling for qualified service.
Confirm that the furnace actually uses a thermocouple
Before you troubleshoot anything, verify that your furnace has a standing pilot with a thermocouple, because every diagnostic step in this article assumes that component. A standing-pilot system has a small flame that burns continuously and a gas control with a knob you hold down while lighting the pilot, as described in Resideo’s lighting instructions for its VS8510/VS8520 millivolt gas controls.
Here is the honest limit of the available evidence: the sources used for this article distinguish thermocouples from thermopiles and from industrial measurement probes, but none of them provides a reliable visual rule for identifying an electronic flame sensor or a hot-surface igniter. If your furnace lights itself electronically, clicks or glows during startup, or has no pilot knob to hold down, thermocouple guidance likely does not apply to it. In that case, your furnace’s model documentation, usually available from the manufacturer using the model number on the unit’s rating plate, is the right place to confirm what ignition system you have. Applying pilot-thermocouple advice to an electronic ignition component wastes time and can lead you to buy the wrong part.
Thermocouple, thermopile, or electronic ignition?
A thermocouple and a thermopile look similar at the pilot but do different amounts of work, and the difference matters when you test or replace one. PlumbersStock’s product guidance explains it simply: a thermopile consists of multiple interconnected thermocouples, so it can generate more electricity and may be used to power the appliance itself, not just prove that a flame exists.
The voltage gap between them is large, which is why the two are not interchangeable in testing. Resideo’s specification sheet for the Q390 thermocouple family lists a normal open-circuit output of 26 to 32 millivolts for its Q309, Q340, and Q390 thermocouples, while the Q313 thermopile in the same document has a normal range of 600 to 750 millivolts. Those figures apply to those named components, not to every pilot device on the market, but the roughly twenty-fold difference illustrates why you need to know which device you have before you interpret any reading.
If your pilot component does not match either description, or your furnace has spark ignition, a glowing igniter, or a sensor rod with no pilot knob, the evidence here does not support diagnosing it. Pull the furnace’s model number and consult its service documentation or a qualified technician rather than guessing from appearance.
Residential safety thermocouples versus industrial furnace probes
The same search term covers two different products, and mixing them up leads to the wrong purchase. The residential device discussed in this article is a flame-proving safety component: Hello Super’s troubleshooting guide describes it as a safety device that hooks to your furnace and turns the gas off if the pilot light goes out.
Industrial furnace thermocouples are measurement instruments instead. Fisher Scientific lists thermocouples used for accurate temperature measurement that work with thermocouple controllers for precise furnace temperature control, and Omega Engineering sells Type R, S, and B platinum thermocouple probes with ceramic protection tubes for high-temperature applications. Those probes measure heat inside laboratory and industrial furnaces; they do not hold a residential gas valve open, and nothing in this article’s cleaning, testing, or replacement guidance applies to them.
The practical rule: if you are troubleshooting a home heating furnace with a pilot light, and your furnace’s documentation confirms it uses a residential safety thermocouple rather than a thermopile or a model-specific pilot assembly, you want the copper-tube safety thermocouple sold by hardware and HVAC suppliers, not a platinum measurement probe. If you are selecting a probe for a high-temperature process, this article is not your guide.
Diagnose the pilot symptom before blaming the thermocouple
What the pilot actually does tells you where to look first, and the two main failure patterns point in different directions. Home Depot’s guide draws the distinction directly: if the pilot flame ignites but goes out after you release the gas control knob, the cause may be a dirty or defective thermocouple, but if the gas is on and the flame will not ignite at all, a pilot tube obstruction is the most likely issue.
Treating every pilot outage as a thermocouple failure is the most common misdiagnosis this article can help you avoid. Watch the pilot through one careful lighting attempt, following the appliance’s own lighting instructions, and note exactly which of the two patterns you see. Then check the flame’s strength and position against the thermocouple tip, because flame contact problems mimic component failure. The next three subsections walk through each observation and what it changes.
The pilot will not ignite
If gas is on but no flame appears at the pilot when you attempt to light it, the thermocouple is probably not your first problem. The thermocouple’s job begins only after a flame exists; it converts pilot heat into voltage. A pilot that never produces a flame points upstream of the thermocouple, toward gas delivery at the pilot itself.
Home Depot’s guide identifies a pilot tube obstruction as the most likely issue when the gas is on but the flame will not ignite at all. The same guide also notes a related overlap: soot and carbon buildup around the pilot area can prevent a pilot from lighting properly, so a dirty pilot assembly can blur the line between the two symptoms.
The practical takeaway is about sequence, not certainty. When ignition itself fails, resolve the gas-delivery question first, whether that means clearing an obstruction per your appliance’s instructions or having a technician inspect the pilot tube. Replacing the thermocouple at this stage treats a component that has not yet had a chance to fail. If you smell gas at any point during lighting attempts, stop immediately and follow the safety guidance later in this article.
The pilot lights but goes out after knob release
This is the signature thermocouple symptom. The gas control knob manually holds the pilot valve open while you press it; once you release it, only the thermocouple’s millivolt output keeps the safety valve open. Resideo’s VS8510/VS8520 instructions describe this handoff: you hold the knob down until a strong flame is present, approximately 60 seconds, and then release it so the shaft engages the safety valve.
If the flame dies at that handoff, the gas control is not receiving enough voltage to hold the valve open. Home Depot’s guide lists a dirty or defective thermocouple as the likely cause of this exact pattern, and Hello Super adds two gentler possibilities worth checking first: a dirty thermocouple will not detect the pilot flame properly, and a slight alignment issue in the socket can cause the same failure.
The symptom is strong evidence, not conclusive proof. A weak or misplaced pilot flame that barely touches the thermocouple produces the identical result with a perfectly good component, which is why the flame check in the next section comes before any purchase. If you held the knob for well under a minute, also try again with a longer hold, since Resideo’s own procedure expects roughly 60 seconds of heating before release.
Check flame strength and contact position
Before you test or replace anything, look at the pilot flame itself, because flame problems produce thermocouple symptoms. Check whether the pilot flame actually reaches and heats the thermocouple, and verify the correct flame placement against your appliance’s own documentation. A flame that fails to heat the tip cannot generate a reliable holding voltage. A flame that misses that zone cannot heat the tip enough to generate a reliable holding voltage.
The same guide describes the visual clues that tell you the flame is off target:
- A weak, orange-yellow flame, or one that barely reaches the thermocouple, indicates the pilot flame is too low.
- A flame that extends well above the thermocouple indicates it is too high.
- Visible soot or carbon deposits on the thermocouple tip suggest buildup that insulates it from the flame’s heat.
Treat these as diagnostic clues, not a universal setup specification, since pilot flame requirements vary by appliance and the correct adjustment procedure lives in your furnace’s own documentation. There is also a useful field observation from a DIY Chatroom repair thread worth noting in bounded terms: one poster who repositioned the pilot so the flame was just contacting the thermocouple reported that the thermocouple stopped glowing cherry red and the pilot stayed lit. That is one person’s account, not a proven rule, but it reinforces the broader point that flame contact and intensity affect the thermocouple’s behavior and lifespan. If the flame looks healthy and hits the right zone yet the pilot still dies after knob release, the thermocouple itself becomes the prime suspect.
Safety checks and stop conditions
One condition overrides everything else in this article: if you smell gas or hear a hissing sound, do not attempt to relight the pilot. Home Depot’s guide is explicit that this situation calls for immediately evacuating the building, not troubleshooting. Leave, and contact your gas utility or emergency services from outside. No pilot repair is worth working through an active gas leak.
For ordinary troubleshooting with no gas odor present, Home Depot’s guide lists the shutdown steps to complete before any repair on a gas appliance:
- Turn off the power to the unit or flip the appropriate circuit breaker.
- Shut off the gas and turn the gas valve to the “Off” position.
- Give the appliance at least five minutes to cool down and let any residual gas clear out.
Two more safety points come from manufacturer documentation and deserve equal weight. Resideo’s VS8510/VS8520 instructions warn you to stand away from the main burner while lighting, because hidden gas leaks can cause flashbacks in the appliance vestibule. The same document instructs you to check for gas leaks with a rich soap and water solution any time work is done on a gas system: paint the pipe connections with the solution, and bubbles indicate a leak. Follow the manufacturer’s complete leak-test procedure, which requires the tested gas connections to be appropriately pressurized; if you cannot safely restore the gas supply and complete the test, have a qualified gas technician do it. If a leak cannot be stopped by tightening connections, Resideo’s procedure calls for replacing the part rather than living with the leak. If you do any work that disturbs the thermocouple’s connection at the gas valve or any gas fitting, that leak test is part of the job, not an optional extra.
On the question of who should do this work, the honest answer is that the available evidence does not establish a universal rule for homeowner eligibility, licensing requirements, or competency thresholds, and those rules vary by jurisdiction. A reasonable personal boundary: if you cannot confidently complete the shutdown steps, cannot perform the soap-and-water leak test after reassembly, or find the pilot assembly damaged or hard to access, stop and bring in a qualified gas technician. Getting a second opinion costs less than an unverified gas connection.
Decide whether to clean, realign, test, or replace
Once you have confirmed the component, identified the symptom, and completed the safety shutdown, the remaining decision is which action to take first. The supported sequence runs from least invasive to most: inspect the flame, clean and realign, test against the installed model’s documentation, and replace only if the symptom persists. The matrix below consolidates the branches from Home Depot’s replacement guide, Hello Super’s alignment advice, and Resideo’s model-specific test documentation.
| Symptom or finding | First check | Supported next action | Evidence limit |
|---|---|---|---|
| Pilot will not ignite at all with gas on | Pilot gas delivery | Investigate pilot tube obstruction (Home Depot) before touching the thermocouple | Symptom does not prove or rule out thermocouple failure |
| Pilot lights, dies after knob release | Flame strength and contact position | Clean deposits and center the thermocouple in its socket (Home Depot, Hello Super) | Symptom is consistent with a bad thermocouple but not conclusive |
| Visible soot or carbon on the tip | Deposit buildup | Clean the thermocouple; cleaning can fix the issue and extend the device’s life (Home Depot) | Cleaning is a reasonable first step, not a guaranteed fix |
| Symptom persists after cleaning and realignment | Millivolt output | Test against the installed thermocouple and gas control’s documented values (Resideo) | No universal millivolt cutoff exists across models |
| Pilot still will not stay lit after cleaning | Whether prior steps were completed | Replace the thermocouple (Home Depot) with a verified-compatible part | Replacement resolves only thermocouple-caused failures |
Use the matrix as a routing tool, not a diagnosis engine. Each row’s action assumes the earlier rows were checked, and the evidence-limit column exists because none of these findings alone proves the thermocouple is bad. The next three subsections cover each action in the depth the evidence supports.
Clean and realign before replacing the part
Cleaning and repositioning come first because they are free, reversible, and address two documented failure causes. Home Depot’s guide states that a pilot light may fail because of soot and carbon buildup on the thermocouple, and that cleaning the thermocouple can both fix the issue and extend the life of the device. A layer of deposits insulates the tip from the pilot flame, so the thermocouple never gets hot enough to produce its full output even though nothing inside it is broken.
Alignment is the second easy win. Hello Super’s guidance is direct: before completely replacing your thermocouple, try adjusting its position to center it in the socket, because there is a good chance a slight alignment issue is causing the problem. A thermocouple that has drifted or been nudged out of the flame path behaves exactly like a failed one, and no replacement part will fix a positioning problem, since the new part will sit in the same wrong spot.
Do both checks with the power and gas shut off per the safety section, and confirm afterward that the pilot flame hits the upper portion of the tip as described earlier. Keep expectations calibrated: cleaning is a reasonable, supported first step, not a guaranteed repair. If the pilot still dies after knob release with a clean, centered thermocouple and a healthy flame, move to testing or replacement rather than repeating the cleaning cycle.
Use the model-specific millivolt test
There is no single millivolt number that separates a good furnace thermocouple from a bad one, because acceptable output depends on which thermocouple and which gas control are installed. The published values from the sources in this article’s evidence make the point better than any argument. Home Depot’s general guide says to test with a multimeter on a DC volt scale and that a reading above 25 millivolts means the thermocouple is not the source of the problem. Resideo’s own documentation, however, publishes different thresholds for different named components, measured under conditions specific to each system.
| Source and component | Documented condition | Documented values |
|---|---|---|
| Home Depot general guide | Multimeter on DC volt scale | Above 25 mV: thermocouple is not the problem |
| Resideo Q309, Q340, Q390 thermocouples | Open circuit | Normal range 26 to 32 mV; lowest acceptable 18 mV |
| Resideo Q335 thermocouple | Open circuit | Normal range 20 to 30 mV; lowest acceptable 15 mV |
| Resideo VS8421 gas valve, Test C thermocouple | Thermostat contacts open, pilot lit, knob at PILOT; use the exact meter connections shown in the model’s service documentation | Minimum 12 mV in a new ODS pilot burner assembly; below 12 mV, replace the ODS pilot burner assembly; power unit holds in down to 3 mV |
| Resideo Q313 thermopile (for contrast) | Open circuit | Normal range 600 to 750 mV; lowest acceptable 540 mV |
Read that table as a warning against borrowed numbers. The 25 mV, 18 mV, 15 mV, and 12 mV figures are not competing opinions about one universal cutoff; they are different specifications for different components measured under different conditions. A reading that condemns one system passes another. Notice also that the VS8421 procedure calls for replacing the ODS pilot burner assembly, not a bare thermocouple, when the reading falls below 12 mV, which shows that even the corrective action is model-specific.
The evidence available here does not supply a universal meter setup, polarity convention, adapter requirement, or loaded-test procedure for every furnace, so this article will not invent one. If you want a reading you can act on, find the documentation for your installed gas control and thermocouple (the gas valve body usually carries a model number) and use that document’s test conditions and thresholds. If you cannot identify the installed components, a technician with the appropriate service literature can interpret a reading that would otherwise be a meaningless number.
When replacement is the next step
Replacement is the supported next step when the pilot still will not stay lit after the earlier checks are done. Home Depot’s guide states the trigger plainly: replacing a thermocouple becomes necessary when the pilot light won’t stay lit even after the old thermocouple has been cleaned. If you also verified flame contact, centered the part in its socket, and (where documentation allowed) confirmed a low millivolt reading, you have reasonable grounds to replace rather than keep cleaning.
Be aware of what this article can and cannot tell you about the procedure itself. The evidence supports the surrounding requirements: complete the power and gas shutdown first, allow at least five minutes for cooling and residual gas to clear per Home Depot’s safety steps, and perform Resideo’s soap-and-water leak check on any connections you disturbed before returning the furnace to service. The evidence does not support a universal removal-and-installation walkthrough, torque values, or connector procedures that apply to every furnace, because routing, fittings, and pilot assembly design vary by appliance. Your furnace’s own instructions, or the instructions packaged with the replacement part, govern the mechanical details.
One installation caution from the DIY Chatroom thread is worth passing along as practitioner advice rather than a specification: seat the connection at the gas valve snug but not overtight, since overtightening can crush the lead connection, and avoid a sharp bend where the lead meets the valve, because the internal connection can break. If any step exceeds your comfort or the connections will not seal, hand the job to a qualified technician.
Choose a compatible replacement thermocouple
The word “universal” on a package is a marketing description, not proof the part fits your furnace. Home Depot’s guide gives the baseline selection rule, choose the new thermocouple based on the size and mounting style of the old one, and the retail evidence shows why that rule needs reinforcement with model verification.
Lead length alone varies widely. A single Amazon listing for one universal replacement offers 18-inch, 24-inch, and 36-inch versions, while PlumbersStock carries Mars universal replacement kits at 30 inches (model 72230, TC-30P) and 48 inches (model 72248, TC-48P). A part that is electrically fine but three inches too short cannot be installed, and excess length has to be routed somewhere safe. Meanwhile, some products are explicitly model-bound rather than universal: Lowe’s lists a 39-inch thermocouple built for compatibility with manufacturer part TC-P-04, for use in ProCom ventless gas heaters and fireplaces. That kind of listing is a reminder that certain appliances, especially ventless designs like the ODS pilot burner assemblies in Resideo’s VS8421 documentation, call for a specific assembly rather than a generic thermocouple.
Before you buy, work through this checklist with the old part in hand:
- Record your furnace’s manufacturer and model number from the rating plate, and check its documentation for a specified part.
- Measure the old thermocouple’s lead length and match or slightly exceed it; retail options commonly run from 18 to 48 inches across the listings cited above.
- Match the mounting style and tip dimensions of the old part, per Home Depot’s size-and-mounting-style rule.
- Compare the connection end that threads into the gas valve against your old part before installing.
- Check whether your appliance uses a model-specific pilot assembly (as Resideo’s VS8421 documentation does with its ODS pilot burner assembly), in which case a bare universal thermocouple may be the wrong purchase entirely.
The honest limit here is that the available evidence does not establish a general rule for when a universal part is acceptable versus when an OEM assembly is required; that determination is appliance-specific. When your furnace documentation names a part, use it. When it does not, matching size, mounting style, and length against the old part, and confirming fit against the furnace model before you commit, is the best-supported path to a compatible purchase.
When a new thermocouple does not solve the problem
If a correctly installed new thermocouple does not keep the pilot lit, or replacements keep failing within months, the task changes from swapping parts to diagnosing the pilot and burner system around them. A string of short-lived thermocouples is rarely a string of defective parts; it is more often a signal that something in the operating environment is stressing or starving the component.
The best-supported area to revisit is flame setup. The best-supported area to revisit is flame setup: compare the pilot flame’s position and intensity against your furnace manufacturer’s instructions, or have a technician evaluate them. The DIY Chatroom thread titled “Furnace eats Thermocouples” illustrates the connection anecdotally: a poster whose thermocouple was glowing cherry red repositioned things so the flame was just contacting the tip, and reported hoping this would end failures that had been occurring roughly every two months. Treat the overheating explanation as a plausible forum theory, not an established cause, but treat the flame check itself as a legitimate step supported by the mainstream guidance.
The same thread raises installation stress, overtightening that crushes the lead connection and sharp bends at the gas valve that break the internal connection, as another candidate cause. These are practitioner observations from a discussion forum, so hold them loosely, but they cost nothing to check on your next installation.
Beyond flame setup and installation care, the remaining possibilities sit outside what this article’s evidence can resolve. The gas control itself can fail to hold even with adequate voltage; The gas control itself can fail to hold even with adequate voltage, and resolving that requires model-specific gas-control diagnosis using the applicable service documentation or a qualified technician, precisely because the valve, not the thermocouple, is sometimes the faulty component. Drafts, burner operation, and venting issues are frequently discussed candidates, but nothing in the cited sources establishes them as verified causes, and diagnosing them requires appliance-specific investigation. At this point, the practical decision is escalation: a technician with your furnace’s service documentation can test the gas control, evaluate the pilot and burner system as a whole, and stop the cycle of replacing a part that was never the root problem.