
System Decisions
Why Your Home Is Still Cold—and How to Narrow Down the Cause
For heating, a thermostat can show 70°F while a distant bedroom is 65°F. First compare readings beside the sensor, then watch how the system runs.
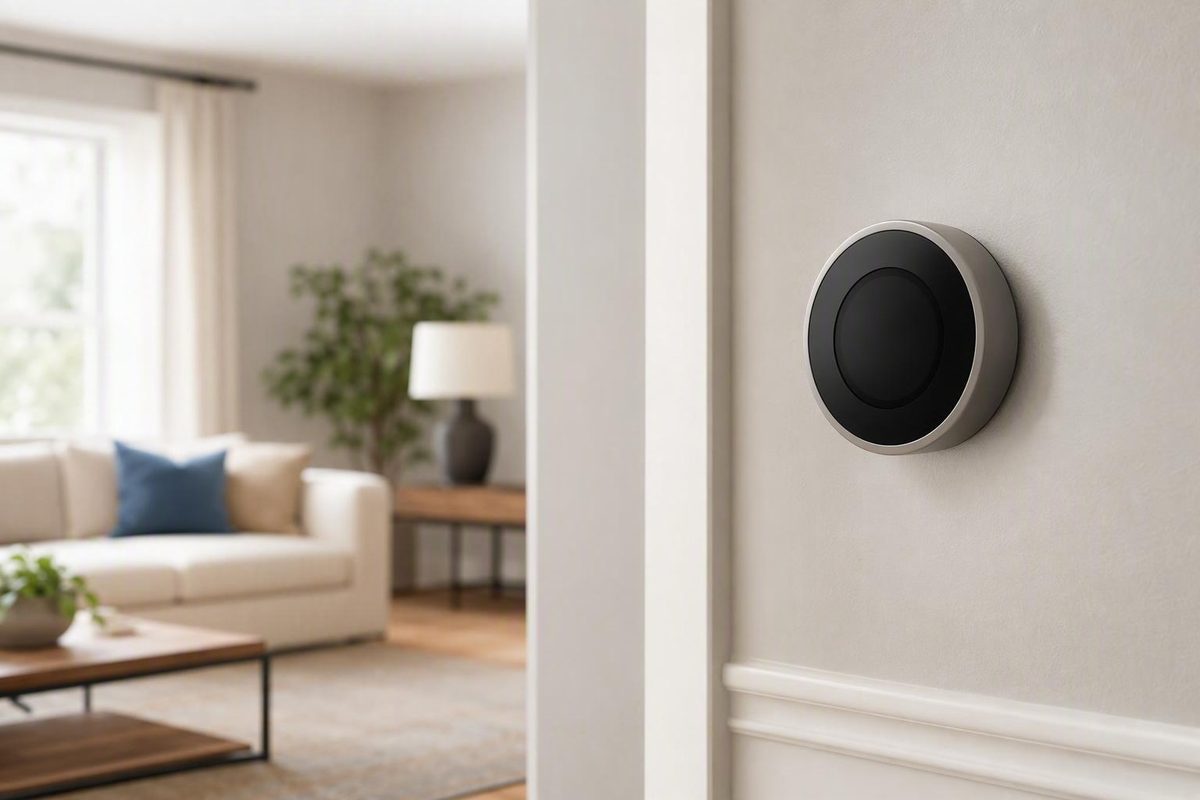
When a room temperature is lower than the thermostat setting, it is tempting to blame the thermostat. But the thermostat may be measuring its own location correctly while another room loses more heat or receives less conditioned air. It may also be calling for heat correctly while the furnace, heat pump, ductwork, or controls cannot deliver enough heat.
The fastest way to narrow the cause is to separate temperature measurement from heat delivery. Verify what is being measured and where, complete a few low-risk checks, and then observe how the heating system responds.
Do not begin by replacing the thermostat, raising the setting dramatically, or opening equipment panels. First identify which pattern fits:
- The heating system does not start.
- It starts but stops too soon or cycles repeatedly.
- It runs continuously without reaching the setpoint.
- The thermostat area becomes comfortable, but one room or floor remains cold.
These patterns are clues, not diagnoses. Each points toward a different group of possible causes.
First clarify which temperature is lower—and where it was measured
The setpoint is the target temperature you request. The thermostat’s displayed room temperature is the temperature measured by its built-in sensor—or by a selected remote sensor—not necessarily an average of the entire home.
For example, a thermostat set to 70°F may display 70°F while a thermometer in a distant bedroom shows 65°F. That does not automatically mean either device is wrong. The thermostat may be accurately reporting the hallway while the bedroom has weaker airflow, greater exterior exposure, drafty windows, or more heat loss.
Write down three pieces of information:
- The heating setpoint.
- The temperature shown on the thermostat.
- The temperature shown by a separate thermometer and where that reading was taken.
Then identify the scope of the problem:
- Thermostat area or potentially broader problem: The thermostat itself shows a temperature below the heating setpoint. Check other rooms before calling it a whole-home issue.
- Confirmed whole-home problem: Readings or consistent conditions across several rooms show that most of the home is below the target.
- One floor or zone: Several connected rooms are cold, but the thermostat area is comfortable.
- One room: A bedroom, office, addition, or other isolated space stays cold.
- Perceived discomfort: The thermostat and room thermometer agree, but the room still feels uncomfortable.
This article focuses on heating. A temperature below a heating setpoint can reflect delayed recovery or inadequate heat delivery. A temperature below a cooling setpoint is a different question involving overcooling, controls, or cycling.
A modest, temporary lag can occur during normal cycling, recovery from a setback, or unusually cold weather.
Instead of relying on a fixed threshold, watch the behavior:
- No start: The thermostat appears to call for heat, but the equipment does not respond.
- Early stop: Heating begins, then stops before the home recovers.
- Continuous run: The system keeps operating but cannot catch up.
- One cold room: The thermostat location reaches its target, but another area does not.
That distinction is more useful than assuming a particular temperature difference proves the thermostat is defective.
Verify the temperature before assuming the thermostat is inaccurate
Test the thermostat at its own location before comparing it with a cold bedroom or another floor.
Place a reliable room thermometer beside the thermostat. Keep the sensors at approximately the same height and avoid positioning the comparison thermometer where it is temporarily affected by:
- Direct sunlight
- A supply register
- An exterior door opening
- A portable heater or fireplace
- A lamp, television, or other heat source
- A localized draft
Allow the comparison thermometer to stabilize. Do not draw a conclusion from the first number that appears. Compare the readings several times over a heating cycle or longer period, especially if the system has just started or stopped.
This side-by-side test creates two useful paths:
If the thermostat and nearby thermometer broadly agree: The thermostat may be measuring its location reasonably well. If another room remains cold, investigate room-to-room airflow, duct delivery, windows, drafts, insulation, floor level, exterior exposure, and whether the thermostat location represents the occupied rooms.
If the readings repeatedly disagree: Possible categories include sensor contamination, poor placement, calibration, power trouble, an incorrectly selected remote sensor, or thermostat failure. The disagreement identifies a measurement problem worth investigating; it does not establish which component is responsible.
A thermostat measures the air around its sensor, so a correct local reading can coexist with substantially different conditions elsewhere. Comparing a thermometer beside the thermostat before testing other rooms is therefore a useful first step, as explained in this guide to thermostat readings and room-to-room differences.
To map conditions afterward, use the same thermometer—or comparable thermometers—at similar heights and under similar conditions. Record the readings instead of moving a thermometer rapidly from room to room. Give a relocated thermometer time to adjust.
Before changing calibration, configuration, sensor selection, or reset settings, consult the manual for the exact thermostat model. Do not use universal calibration offsets, voltage tests, terminal-jumper tests, or internal wiring procedures.
Also record what changed immediately before the problem began:
- A thermostat was installed or replaced.
- HVAC maintenance or repair was completed.
- A power outage occurred.
- A renovation, addition, or insulation project was completed.
- Furniture was moved over a return or register.
- A schedule, eco mode, occupancy rule, or smart-home routine was changed.
Timing does not prove causation, but it gives a technician a useful place to begin. A thermostat that has behaved incorrectly since installation, for example, warrants a review of compatibility, configuration, sensor selection, and wiring rather than an automatic second replacement.
Run the safe five-minute settings, power, filter, and vent check
These checks are observational and do not require opening electrical or sealed equipment compartments.
Confirm the operating mode and target
Make sure the thermostat is set to HEAT and the target is above the measured indoor temperature. If the display shows “Heat On,” “Heating,” or a similar indicator, note whether the equipment responds.
Review:
- Programmed schedules
- Temporary and permanent holds
- Away, vacation, sleep, or eco modes
- Occupancy settings
- Smart-home automations
- The sensor currently selected for control
A remote bedroom sensor, averaged sensor group, or occupancy rule may be controlling the system instead of the thermostat’s built-in sensor. Do not assume the main screen’s displayed temperature is necessarily the only control input.
Manufacturer guidance also recommends checking Heat mode, the target temperature, batteries, schedules, filters, and system power before moving to deeper diagnosis (Lennox thermostat troubleshooting guidance).
Do not keep raising the setpoint to make the home heat faster. The thermostat requests operation; selecting a much higher target generally does not increase the equipment’s heating rate.
Check thermostat and equipment power
If the thermostat uses replaceable batteries, install the type specified by its manufacturer when the batteries are weak or the display is fading or unresponsive.
Verify that:
- The thermostat display is active.
- The heating equipment’s normal service switch has not been turned off accidentally.
- Any homeowner-visible status light or display shows no obvious error.
- The appropriate breaker is in its normal position.
If a breaker has tripped, do not repeatedly reset it. A breaker that trips again requires qualified electrical or HVAC service. Do not remove thermostat wires, bypass controls, open electrical compartments, or touch visibly damaged wiring; suspected wiring faults should be handled by a qualified technician (thermostat power and wiring guidance).
Inspect the filter
For a forced-air furnace or heat pump, inspect the filter at its normal homeowner-accessible location. Replace it if it is loaded with debris or when required by the filter and equipment manufacturers.
A clogged filter can restrict airflow, weaken heating performance, and in some systems contribute to overheating and protective shutdown. Filter condition is relevant whether the system runs continuously or begins heating and then stops unexpectedly.
Install the correct filter size and orientation.
Follow system-specific instructions rather than looking for forced-air components that are not present.
Open and uncover air openings
For forced-air systems, make sure supply registers and return-air openings are open and unobstructed. Look for furniture, rugs, curtains, storage boxes, or heavy dust buildup blocking them.
After these checks, leave the thermostat at a stable heating target and watch what the system does. Its response is the next diagnostic clue.
Follow what the heating system does after the thermostat calls for heat
Once settings, power, the filter, and vents have been checked, pay attention to the operating pattern rather than only the thermostat number.
If the heating system never starts
Determine whether the thermostat indicates an active heat call. Then observe whether the furnace, air handler, boiler, heat pump, or baseboard controls respond at all.
Possible categories include:
- An incorrect mode, schedule, or override
- Weak thermostat batteries
- Loss of equipment power
- A thermostat or control problem
- Incorrect configuration
- Damaged or disconnected wiring
- An equipment fault or safety lockout
Look for a visible warning message, error code, or status light without opening a compartment. Write down the exact code instead of clearing it. If the trouble began after thermostat installation, professional review of compatibility, configuration, and wiring is appropriate.
If it starts but stops too soon
Repeated short cycles can arise from thermostat placement, configuration, airflow restriction, control trouble, or an equipment fault. Short cycling alone does not prove that the thermostat is bad.
Observe:
- Whether air begins moving before shutdown
- Whether airflow feels normal or weak
- Whether an error code appears
- Whether the system restarts quickly or remains off
- Whether the pattern occurs only during severe weather or under all conditions
- Whether the filter was recently changed
- Whether the behavior began after maintenance or installation
Do not bypass a safety control to keep the equipment running. A protective shutdown may indicate an airflow or equipment problem that requires diagnosis, and wiring or internal control work should be left to a qualified professional (Lennox guidance on heating failures and protective shutdowns).
If it runs continuously without catching up
A correctly operating thermostat can continue calling for heat while the heating system remains unable to deliver enough heat to reach the target.
Possible categories include:
- Restricted airflow
- Heat loss through ducts
- Severe outdoor conditions
- Inadequate equipment output
- Equipment capacity that does not match the home’s heating load
- A burner, blower, compressor, control, or other equipment fault
- Excessive heat loss through the building
A long run during setback recovery or severe weather is not automatically a failure. The more useful question is whether the indoor temperature is rising, holding steady, or continuing to fall.
If airflow is weak throughout the home, return to the filter and blocked-opening checks. If those are clear and airflow remains weak, arrange professional assessment.
If airflow seems normal but does not feel warm enough, identify the equipment type before judging it. Furnace air often feels distinctly hot. Heat-pump air is commonly less intense, so hand-feel alone is not a reliable test of heat-pump output.
If only one room remains cold
When the thermostat area reaches the target but one room does not, the thermostat may be doing exactly what it was asked to do at its location. Investigate distribution and room-specific heat loss before replacing it.
Record the following for a service call:
- Heating setpoint and thermostat reading
- Separate room temperatures and measurement locations
- Outdoor conditions
- Whether the system starts, short-cycles, or runs continuously
- Airflow strength at relevant registers
- Rooms or floors affected
- Error codes
- Unusual noises or odors
- Visible ice or water
- Recent thermostat, HVAC, electrical, or renovation work
These observations help distinguish sensing trouble from a heat-delivery problem.
If only one room is cold, investigate distribution and the building—not just the thermostat
A thermostat controls heating according to the temperature at its sensor location unless a compatible remote-sensor strategy is configured. It cannot know that a distant bedroom is cold merely because that room feels uncomfortable.
Start at the cold room’s supply register. Confirm that it is open and uncovered. During a heating call, compare its airflow with a similar register in a comfortable room. You do not need an airflow meter for this initial observation; note whether the difference is obvious and repeatable.
Weak airflow in one room may point toward a distribution problem such as:
- A disconnected, crushed, or obstructed duct
- Duct leakage
- Damaged duct insulation
- A long or poorly balanced duct run
- A damper or branch problem
- A register or branch that serves the room inadequately
Rooms farther from the heating equipment may receive less conditioned air when duct design, leakage, or balancing is poor. These remain possibilities to investigate, not conclusions based solely on room temperature.
The return-air path also deserves attention. Make sure any return opening is unobstructed. If the room’s conditions change noticeably depending on whether its door is open or closed, record that pattern for the technician rather than modifying doors, ducts, or return openings yourself.
Next, examine the room for heat-loss factors:
- Drafty windows or exterior doors
- Gaps around trim or penetrations
- Weak wall, floor, or attic insulation
- Multiple exterior walls
- Large areas of glass
- Wind exposure or limited winter sunlight
- A location above a garage, crawlspace, or other unconditioned area
- A high or low floor in a multistory house
Warm air rises while cooler air settles, which can contribute to vertical temperature differences. Air leakage, stairways, exterior exposure, and duct layout can reinforce those differences.
Potential remedies depend on the actual cause. Thermostat relocation, compatible remote sensors, zoning, duct correction, air sealing, insulation work, and window improvements may help in the right situation. None is an automatic fix.
Remote sensors can make control more representative by measuring an occupied room or using a configured average. They cannot repair a leaking duct, restore restricted airflow, add missing insulation, or correct failing heating equipment.
Likewise, do not assume larger HVAC equipment is the answer. A capacity change should follow professional load and distribution assessment. An adequately sized system can perform poorly if heat does not reach the room, while an inappropriate capacity change may introduce new comfort or cycling problems.
Check whether the thermostat’s location is controlling the wrong microclimate
The air immediately around a thermostat can differ from conditions elsewhere. That local environment—the thermostat’s microclimate—may cause the heating call to end too early or continue longer than expected.
Potentially unrepresentative influences include:
- Exterior walls
- Windows and exterior doors
- Drafts
- Direct sunlight
- Supply registers
- Fireplaces
- Kitchens
- Lamps, televisions, and electronics
- Nearby appliances
- Sheltered hallways with little exposure to occupied rooms
Both directions of error matter.
If the thermostat is warmed by sunlight, a nearby register, cooking, or electronics, it may reach the target and end the heating call while occupied rooms remain cold. If it is in a drafty or unusually cold location, it may keep the system running after other rooms are already warm.
Before paying for relocation or replacement:
- Note or photograph what surrounds the thermostat.
- Check for a nearby register, door, window, exterior wall, or heat source.
- Compare a stabilized thermometer beside the thermostat.
- Compare readings in affected rooms under similar conditions.
- Note whether the discrepancy changes with sunlight, cooking, fireplace use, or an open exterior door.
This evidence can help distinguish poor sensor location from inaccurate sensing or inadequate distribution.
Dirt or sensor contamination is another possibility, but cleaning instructions vary. Follow manufacturer-approved guidance for the exact model. Do not assume every thermostat faceplate should be removed or that an internal sensor should be brushed or sprayed.
If relocation or wiring changes appear appropriate, use a qualified professional. Moving a thermostat may require new wiring, wall work, configuration changes, and selection of a more representative location. Poor placement is one possible cause, not a diagnosis or a universal explanation.
Use a separate troubleshooting branch for heat pumps
Heat pumps should not be judged by furnace expectations. A combustion furnace typically supplies more intense heat, while a heat pump commonly delivers air that feels only moderately warm. That air may feel cool against skin even while it is adding heat to the room.
Heat pumps may also recover gradually after a setback. As outdoor temperatures fall, available heating capacity and recovery behavior depend on the model, installation, climate, building load, and auxiliary-heat design. Slow recovery is therefore context, not a diagnosis.
Defrost adds another complication. In cold weather, light frost can form on the outdoor coil. The system may periodically enter a defrost cycle, during which indoor air can briefly feel cooler. Light frost that clears during defrost may be normal; thick or persistent ice warrants evaluation. Carrier’s heat-pump troubleshooting guidance also distinguishes normal defrost behavior from persistent icing and identifies thermostat mode, breakers, filters, airflow, and outdoor obstructions as initial checks.
Homeowner checks should remain limited to:
- Confirming HEAT mode
- Reviewing schedules and overrides
- Checking thermostat and equipment power status
- Inspecting the filter
- Confirming indoor airflow
- Looking for leaves, snow, or debris visibly obstructing the outdoor unit
- Observing whether light frost clears
- Recording whether performance differs between heating and cooling modes
A heat pump that cools normally but heats poorly may have a reversing-valve, control, or other mode-specific fault. That pattern is useful to report, but it is not suitable for DIY diagnosis. Refrigerant problems, reversing valves, defrost controls, recurring electrical faults, and internal equipment failures require professional service.
Do not apply universal instructions for auxiliary or emergency heat. Control strategies vary, and relying on electric-resistance emergency heat can increase electricity use and operating cost. Follow the thermostat and equipment manuals, and ask a qualified technician how auxiliary heat is intended to operate in your installation (Carrier guidance on supplemental heat and professional repair).
Arrange an assessment if the heat pump cannot recover, airflow remains weak, heavy ice persists, a breaker trips again, or unusual noise or electrical symptoms appear.
Know when to stop troubleshooting and what to tell the technician
Request professional assessment when the room or home persistently remains below the heating setpoint after you have:
- Verified where the temperature was measured
- Compared a thermometer beside the thermostat
- Confirmed HEAT mode and the target
- Reviewed schedules, holds, eco settings, and sensors
- Checked thermostat and equipment power
- Inspected the filter
- Opened and uncovered supply and return openings
- Observed the system’s runtime pattern
Other reasons to arrange service include:
- Nonstop operation without meaningful recovery
- Repeated short cycling
- Weak airflow after basic obstruction checks
- Error or lockout codes
- Unusual mechanical noises
- Water or a suspected equipment leak
- Heavy or persistent heat-pump ice
- Suspected wiring trouble
- A problem that began immediately after thermostat installation
Stop troubleshooting if you notice a burning odor or loud electrical buzzing. These are explicit reasons to stop homeowner checks and request service rather than opening panels or handling internal components (homeowner HVAC stop conditions).
Visible wiring damage or a breaker that trips repeatedly also requires qualified service. Do not keep resetting the breaker or touch damaged conductors.
Leave the following to qualified professionals:
- Thermostat wiring
- Damaged electrical conductors
- Capacitors and internal controls
- Refrigerant circuits
- Reversing valves
- Defrost-control diagnosis
- Sealed equipment components
- Mercury thermostat handling
- Combustion-equipment repair
Prepare for the service call by providing specific observations:
- Setpoint and thermostat reading
- Separate thermometer readings and their locations
- Outdoor conditions
- One-room, one-floor, or whole-home scope
- Whether the system fails to start, cycles briefly, or runs continuously
- Whether airflow is normal or weak
- Error codes and warning messages
- Noises, odors, water, or ice
- Filter condition and replacement date
- Recent thermostat, HVAC, renovation, or electrical work
- Whether the system is a furnace, heat pump, boiler, baseboard system, or another type
Ask the technician to distinguish among thermostat sensing, thermostat configuration, airflow, duct distribution, equipment output, capacity, and building-envelope heat loss before recommending replacement.
HVAC Lens is a homeowner guide to understanding residential HVAC behavior, including filters, cycling, airflow, and room-to-room comfort clues.
Its editorial focus is general homeowner information rather than contractor diagnosis.
Frequently asked questions
Why does the thermostat say 70°F while my bedroom is only 65°F?
The thermostat measures temperature at its sensor location, not automatically in the bedroom. The hallway or central area may have reached 70°F while the bedroom receives less airflow or loses more heat through windows, exterior walls, weak insulation, or air leaks.
Compare a reliable thermometer beside the thermostat first. If those readings agree, inspect the bedroom register, nearby return opening, drafts, windows, and airflow relative to similar rooms. Also consider the room’s floor level, exterior exposure, and distance along the duct system.
A compatible remote sensor may make control more representative, but it will not repair a distribution or insulation problem.
How can I test whether my thermostat is reading the correct temperature?
Place a reliable thermometer beside the thermostat at approximately the same height. Keep it away from direct sun, registers, drafts, doors, and heat-producing devices. Allow it to stabilize, then compare readings over time rather than relying on one immediate observation.
If the readings broadly agree, investigate why another room differs. If they repeatedly disagree, consult the exact thermostat manual for guidance on sensor selection, calibration, cleaning, configuration, or reset procedures. Do not use generic wiring, voltage-testing, or terminal-jumper instructions.
Can a dirty air filter keep the house from reaching the heating setpoint?
Yes. In a forced-air system, a loaded filter can restrict airflow, reduce heat delivery, lengthen runtime, and in some systems contribute to protective shutdown.
Check the normal homeowner-accessible filter location and replace the filter when it is loaded or according to the filter and equipment manufacturers’ instructions. Use the correct size, type, and orientation.
If airflow remains weak after the correct filter is installed and registers are unobstructed, request professional assessment. Replacing a filter will not repair a blower, duct, control, or equipment fault.
Why does my heat pump blow air that feels cool while the thermostat is calling for heat?
Heat pumps generally deliver less-intense heat than combustion furnaces, so their supply air may feel only moderately warm. A temporary defrost cycle can also make indoor air feel cooler for a short period.
Confirm HEAT mode, inspect the filter, check airflow, and observe the outdoor unit without opening it. Light frost that clears can be normal. Persistent heavy ice, continuous cool air without temperature recovery, weak airflow, recurring breaker trips, or unusual noise requires professional evaluation.
When should I call an HVAC technician because the room remains below the thermostat setting?
Call when the temperature remains below the setpoint after basic measurement, settings, power, filter, and vent checks—especially if the system runs continuously, short-cycles, will not start, or has weak airflow.
Arrange service for error codes, unusual noises, water, heavy ice, suspected wiring problems, or trouble that began after thermostat installation. Stop homeowner troubleshooting for a burning odor, loud electrical buzzing, visibly damaged wiring, or a breaker that trips again.
Give the technician the measured temperatures, sensor locations, affected rooms, outdoor conditions, runtime pattern, airflow observations, equipment type, error codes, and recent changes.
The decision path is straightforward: verify that the lower number represents the heating problem you think it does, compare a reliable thermometer beside the thermostat, check settings and overrides, confirm power, inspect the filter and open vents, and observe whether the system fails to start, cycles briefly, runs continuously, or leaves only one room cold. These observations narrow the problem; they do not diagnose it.
If the gap persists—or there is weak airflow, heavy ice, an error code, unusual noise, a burning odor, electrical buzzing, damaged wiring, or repeated breaker trips—stop troubleshooting and give a licensed professional the recorded temperature, runtime, airflow, room, weather, and equipment details.
HVAC equipment varies by home, climate, and installation. Major changes should be confirmed with a licensed professional, consistent with HVAC Lens’s general-information and professional-confirmation notice.