
Airflow
Where the Water Appears Tells You What to Check Next
Water from the designated outdoor drain may be normal. Water spreading across a floor, near wiring or with ice and weak cooling needs a different response.
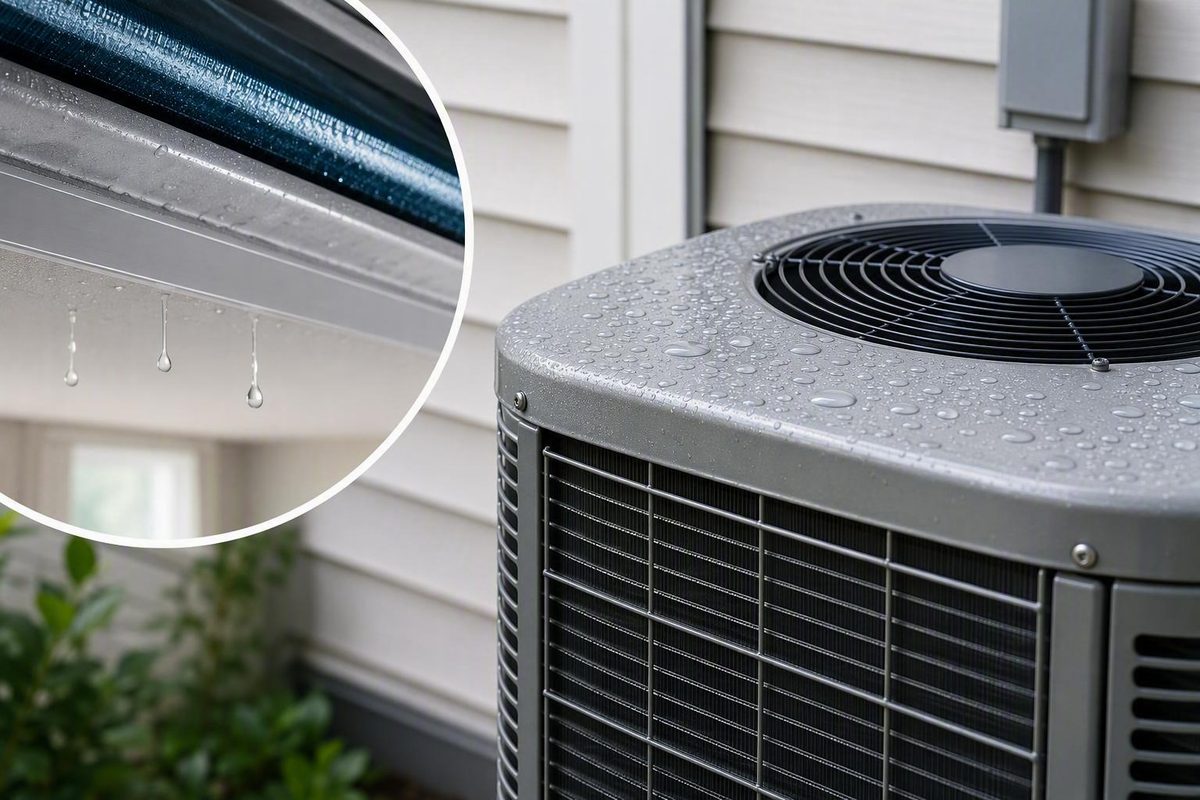
Condensation on an AC is not automatically a leak. An air conditioner is supposed to remove moisture from indoor air as it cools. In a central system, that water should follow a controlled route: from the cold evaporator coil into a condensate pan, then through a drain line or, in some installations, a condensate pump.
The useful question is not simply, “How much water is there?” It is, “Where did the water appear, and what else was happening at the time?”
Water leaving the designated outdoor drain may be normal. Water spreading across a floor, dripping through a ceiling, soaking duct insulation, collecting near wiring, or appearing with ice and weak cooling requires a different response. This location-first approach can help you decide whether to monitor the system, make a few noninvasive observations, turn it off, or request professional service.
First decide: normal condensation, a warning sign, or an urgent leak?
Condensation on the cold evaporator coil is normal. Warm, moisture-bearing air passes over the coil, water vapor forms droplets, and the system routes those droplets away. Dripping from the intended outdoor condensate outlet during a cooling cycle—particularly in humid weather—can therefore indicate that drainage is working as intended. A manufacturer’s explanation of the normal condensate path traces the water from the evaporator coil to the pan and drain.
What is not normal is water repeatedly escaping that route. Persistent indoor dripping, a growing puddle, soaked insulation, a full pan, expanding stains, or moisture entering floors, walls, and ceilings suggests that condensate is not being collected or removed properly—or that the water has another source.
Use this triage guide before trying to identify a mechanical cause:
| Response level | What you observe | What to do |
|---|---|---|
| Monitor | Water leaves the designated outdoor condensate outlet while the AC runs. There is no indoor leakage, ice, odor, shutdown, or cooling problem. | Note the conditions and continue monitoring. Outdoor discharge can change with humidity and runtime. |
| Perform basic visual checks | There is isolated moisture on an accessible cabinet surface, insulated line, vent, or duct, but no pooling or spreading damage. Cooling appears normal. | Photograph the exact location. Look for visible ice, a loaded filter, blocked vents, damaged insulation, or an unusual drain-outlet pattern. Do not open equipment. |
| Arrange service | Indoor moisture recurs, a possible secondary outlet drips, airflow or cooling changes, the system smells musty, stains grow, or the unit shuts down unexpectedly. | Schedule an HVAC inspection. Record when the symptom occurs and whether it follows long cooling cycles or humid weather. |
| Shut down when safe and request urgent help | Water is pooling, spreading into a ceiling or wall, approaching electrical components, or appearing with a frozen coil, failed cooling, full pan, or repeated shutdowns. | Turn the AC off only if you can do so without touching wet equipment, wiring, switches, or panels. Keep clear of wet electrical areas and request qualified service. |
Turning off an actively leaking system is appropriate when water is accumulating or approaching electrical equipment, but you should not enter a wet area or handle wet electrical components to do it. Contractor guidance similarly advises shutting down when safe and avoiding electrical panels, drain cutting, and other invasive work around a condensate leak (condensate-leak safety guidance).
There is no universal number of drips, minutes, or gallons that separates normal from excessive condensation. Water production varies with indoor and outdoor humidity, climate, cooling runtime, equipment capacity, airflow, and installation. A steady outdoor drip on a muggy afternoon can be less concerning than a small indoor drip that repeatedly reaches drywall.
Escalate promptly if moisture appears with any of these signs:
- visible ice on the indoor coil area or insulated refrigerant line;
- weak airflow or failed cooling;
- repeated or unexplained shutdowns;
- a full, overflowing, or badly corroded drain pan;
- water entering a ceiling, wall, floor, or insulation;
- active leakage near wiring, controls, motors, switches, receptacles, or electrical panels.
A shutdown while water is present may be a safety control doing its job. Some systems have a float switch that interrupts operation when backed-up condensate raises the water level. Do not bypass the switch, hold it down, or repeatedly reset the AC. Doing so can defeat the protection and allow an overflow to continue.
How an air conditioner creates and removes water
Condensation is the change from water vapor to liquid droplets. It occurs when warm, humid air contacts a surface cold enough for moisture in the air to condense—the same basic effect that makes a cold glass “sweat.”
In a typical central air-conditioning system, the sequence is:
- Warm indoor air returns to the HVAC equipment.
- The blower moves that air across the cold evaporator coil.
- Moisture condenses on the coil.
- Droplets fall into a condensate pan.
- Water moves through a drain line to an approved discharge point.
This process helps cooling equipment remove moisture from indoor air. The existence of condensate is not the problem. Concern begins when water backs up, misses the pan, escapes a connection, overwhelms a safeguard, or forms on a surface that was not intended to be wet.
Drainage arrangements vary. Some systems rely on gravity, so the line must be configured to let water flow toward the discharge point. Others need a condensate pump because gravity cannot move the water where it needs to go. A pump or reservoir problem can leave standing water near the equipment even when the visible end of the drain is open.
Other installation-dependent components may include:
- a primary drain that carries condensate during normal operation;
- a secondary drain that provides another route under certain backup conditions;
- an auxiliary or backup pan beneath equipment located above finished space;
- a float switch that stops the system when water reaches a set level;
- a condensate pump that lifts water to a drain or discharge point;
- a trap used as part of the drainage configuration.
Do not assume your system has all of these components. Their presence, location, and function depend on equipment design and installation. Two homes with similar-looking air handlers may have different drainage arrangements.
A useful diagram for this topic would label:
- the evaporator coil inside the indoor equipment;
- the condensate pan beneath it;
- the primary drain and discharge point;
- a possible secondary drain and auxiliary pan;
- a possible float-switch location;
- an optional condensate pump;
- supply and return ducts;
- supply registers or vents.
Optional components should be clearly identified as installation-dependent, not universal.
Use the water’s location to narrow the possibilities
Do not begin by assuming every moisture problem is a clogged drain. First identify the precise wet location. The likely cause categories change depending on whether water is at an outdoor outlet, beneath the air handler, on refrigerant-line insulation, around a ceiling vent, or inside a wall.
Use this decision tree:
-
Is the water leaving the designated outdoor drain? If yes, and there is no indoor leak or performance change, normal drainage is plausible.
-
Is it leaving a possible secondary or backup outlet? If the installation has one, discharge may mean the primary drainage route needs inspection.
-
Is it beside or beneath the indoor equipment? Consider drainage, pan, pump, slope, connection, leveling, or thawing-ice problems.
-
Is it on the cabinet or refrigerant-line insulation? Distinguish exterior surface sweating from water escaping inside the unit, and look for visible ice.
-
Is it on vents or ducts? Consider humid-air contact, air leakage, and insulation problems—not only the condensate drain.
-
Is it staining a ceiling, wall, or floor? Act promptly. The source may be upstream from or above the visible stain.
The following table organizes those observations:
| Moisture location | Related observations | Plausible cause categories | Safe first response | Escalation threshold |
|---|---|---|---|---|
| Designated outdoor drain outlet | Drips while cooling; no indoor water; cooling is normal | Normal condensate removal | Monitor during several cooling cycles | Service if indoor water appears or cooling changes |
| Possible secondary outlet | Water exits near an eave, doorway, window, or other conspicuous location | Primary drain restriction, backup-pan water, or another installation-specific condition | Confirm that the outlet is associated with the AC; photograph it | Arrange prompt inspection if discharge continues |
| Beside or beneath indoor unit | Puddle, wet platform, full pan, rust, odor, or shutdown | Drain backup, damaged pan, failed pump, poor slope, disconnected line, leveling problem, thawing ice | Turn the system off when safe if water is accumulating | Urgent if water spreads, reaches electrical parts, or damages finished materials |
| AC cabinet exterior | Beads of moisture rather than a stream; humid equipment space | Surface sweating, missing insulation, air leakage, or internal water reaching the cabinet | Dry the accessible surface and observe where moisture first returns | Service if moisture recurs or internal dripping is visible |
| Refrigerant-line insulation | Damp or deteriorated insulation; possible ice | Humid air reaching a cold line, damaged insulation, icing, or another operating problem | Photograph the condition; do not remove insulation or disturb ice | Turn off when safe and request service if ice is visible or cooling is weak |
| Supply vent or register | Droplets on the grille, staining around the opening, damp ceiling | Cold surface exposed to humid air, duct leakage, insulation gap, or high surrounding humidity | Keep the vent open and unobstructed; inspect only visible surfaces | Service if wetness persists or staining grows |
| Exposed duct | Moisture at seams, joints, supports, or missing insulation | Inadequate, damaged, or wet insulation; air leakage; humid surrounding space | Note the exact sections and surrounding conditions | Professional assessment if widespread, concealed, recurring, or damaging |
| Ceiling, wall, or floor | Brown ring, soft drywall, bubbling paint, wet flooring | Remote AC drain leak, duct condensation, plumbing leak, roof intrusion, or another source | Stop AC operation when safe if it appears related and protect the area without touching wet electrical equipment | Prompt or urgent service depending on active flow and electrical proximity |
Water at the regular outdoor outlet is generally the least concerning pattern. Water from a secondary outlet is different. If that pipe is truly a backup drain, its purpose may be to make a drainage problem visible before water reaches the building. Because not every system has one—and outlet locations vary—have the pipe identified rather than relying on appearance alone.
A puddle beneath an indoor unit has a broader list of possibilities. A restricted line is one, but so are a cracked or displaced pan, a loose connection, poor drainage configuration, failed pump, or water released as coil ice thaws.
Ceiling and wall stains deserve prompt attention for the same reason. An attic air handler, concealed drain, or sweating duct may be several feet from the visible mark. Plumbing leaks and rain intrusion can produce similar evidence, so do not force every stain into an AC diagnosis.
The main causes of water around an indoor AC unit
Water pooling around an indoor air handler usually points to one or more broad mechanisms:
- normal condensate cannot drain;
- drainage hardware is damaged or configured improperly;
- ice formed and then melted;
- condensation is forming on an unintended cold surface.
A restricted condensate line
Dust, dirt, mineral deposits, insects, and algae-like or other biological buildup can obstruct a condensate line. A partial restriction may still pass some water but fall behind during long cooling cycles or humid weather. A complete blockage may cause water to rise in the pan, move into an auxiliary pan, trigger a float switch, or leak near the equipment.
High humidity does not itself prove that a line is clogged. It can increase condensate production and keep the drainage system wet longer, exposing a restriction or drainage weakness that was already developing.
Pan, slope, leveling, and connection problems
A clear visible pipe does not prove the entire drainage system is sound. Water may escape because:
- the pan is cracked, corroded, displaced, or overflowing;
- the equipment or pan does not direct water toward the drain opening;
- the drain line does not carry water consistently toward the discharge point;
- a connection has loosened or separated;
- a trap is obstructed or incorrectly configured;
- a concealed section of line is blocked or damaged.
These conditions require inspection of the complete drainage route, not only the outdoor end.
Condensate-pump failure
Where gravity drainage is not practical, a pump may collect and move condensate. If the pump loses power, fails to activate, overfills, or cannot move water through its discharge tubing, standing water or a shutdown may result. Systems can use gravity drainage or a pump, and persistent standing water around either arrangement warrants professional evaluation (blocked-line symptoms and drainage arrangements).
A protective float-switch shutdown
An AC that stops while water is present has not necessarily suffered a cooling-component failure. A float switch may have detected rising water and interrupted operation to reduce the chance of overflow.
That does not make repeated shutdowns harmless. It means the protective device may be responding to a drainage fault. Do not defeat the switch or repeatedly reset the system.
Restricted airflow and a frozen coil
An airflow problem can create a different sequence:
- A heavily loaded filter, obstructed supply or return opening, or blower problem reduces airflow across the evaporator coil.
- Under some conditions, ice forms on the coil.
- Airflow and cooling may weaken.
- When the ice thaws, the released water may exceed what the pan and drain can manage at that moment.
A dirty filter is therefore a possible indirect contributor to water around the AC. It does not prove the filter caused the leak, and a drainage restriction and airflow problem can occur together.
Low refrigerant is another possible contributor to coil icing, but condensation, ice, weak cooling, unusual sounds, or a wet floor cannot establish that diagnosis. Refrigerant conditions require appropriate measurements by qualified personnel.
The symptom pattern can help determine the next branch:
- Standing water or a full pan: prioritize the drain, pan, pump, slope, trap, and connections.
- Visible ice with weak airflow: prioritize a frozen-coil and airflow investigation.
- Overflow despite an apparently open visible outlet: inspect the full route, including concealed piping and installation details.
- Leaks mainly during humid weather or long cycles: consider increased condensate production together with a partial restriction, marginal drainage, pump problem, or pan issue.
These causes are not mutually exclusive. Humid weather can raise condensate production while a loaded filter reduces airflow and a partially obstructed line limits drainage.
Why vents and ducts sweat even when the drain is clear
A clear condensate drain does not prevent surface condensation on ducts and vents. These are different moisture mechanisms.
A cold supply register or duct can become cold enough for moisture in warmer surrounding air to condense on its surface. No drain backup is required.
Duct sweating is more likely where cold ductwork passes through warm or humid spaces such as:
- attics;
- crawl spaces;
- basements;
- garages and utility areas;
- poorly ventilated chases;
- other unconditioned or partly conditioned spaces.
Insulation separates the cold duct surface from warmer surrounding air. If that insulation is thin, missing, compressed, poorly fitted, wet, or damaged, humid air may reach the cold surface. Elbows, seams, boots, supports, and transitions can be revealing because insulation continuity may be harder to maintain there.
These are plausible categories, not diagnoses that can be confirmed from a stain alone.
High indoor humidity—or high humidity in the space surrounding the duct—increases the likelihood of sweating. There is no single relative-humidity target that is correct for every climate, season, home, and building assembly. A useful observation is whether the house feels persistently clammy and whether condensation worsens during humid weather.
Closed or blocked vents may coexist with condensation because they alter airflow. Keep supply and return openings unobstructed unless the system was specifically designed or balanced otherwise. Moisture on a vent is not proof of a dirty filter or frozen coil. Persistent vent condensation is commonly associated with humidity, insulation, and airflow conditions (possible causes of condensation on AC vents).
Recurring wetness can stain drywall, dampen insulation, and contribute to corrosion. Persistently damp material may also support mold or mildew, but visible moisture does not prove microbial growth or establish a health effect.
Arrange professional assessment when:
- vent or duct sweating persists through multiple cooling cycles;
- visible insulation is torn, missing, damp, or deteriorated;
- concealed duct insulation may be affected;
- stains continue to enlarge;
- water reaches ceilings, walls, or flooring;
- the problem returns after accessible humidity and airflow conditions have been checked;
- ice, weak cooling, odors, or shutdowns accompany the moisture.
A safe homeowner inspection that does not turn into a repair attempt
The purpose of a homeowner inspection is to document the pattern and check a few accessible conditions—not to prove the mechanical cause.
If water is pooling, spreading into finished materials, or approaching electrical components, turn the AC off only when it is safe to do so. Do not touch wet equipment, open service panels, or approach a wet breaker panel. If shutdown would require entering a wet area or handling electrical equipment, keep clear and request urgent help. Guidance for condensate problems emphasizes shutting equipment down before drain work and recognizing that water and electricity can be dangerous (manufacturer drain-safety guidance).
Use this noninvasive sequence:
-
Find the exact wet location. Identify where the first droplet, wet seam, stain, or puddle appears—not only where water eventually collects.
-
Photograph the condition. Take a wider image showing the equipment or room, then close-ups of the wet area, pan, outlet, insulation, stain, or ice.
-
Record whether the AC is running. Note whether water appears at startup, during a long cooling cycle, after shutdown, or while the system is off.
-
Look for visible ice without opening equipment. Check accessible insulated refrigerant piping and visible cabinet areas. Do not remove covers or insulation to search for ice.
-
Inspect the accessible filter. Look for visible loading, deformation, dampness, and an apparent change in airflow. Check whether replacement is overdue under the filter or equipment instructions.
-
Confirm that supply and return openings are unobstructed. Move furniture, rugs, boxes, or other items that plainly block openings. Do not close multiple vents as a troubleshooting experiment.
-
Look at accessible drainage areas. Without disassembling the unit, observe the pan, pump reservoir, drain connections, and surrounding platform if they are already visible.
-
Observe the outdoor drain outlet. Note whether the designated outlet discharges while the system is cooling. If a second outlet is dripping, document it without assuming it is a secondary AC drain.
Filter evidence is most useful when tied to condition and performance. A visibly loaded filter, noticeably weaker airflow, or replacement that is overdue under model-specific instructions is meaningful. One fixed schedule cannot account for filter construction, runtime, pets, dust, occupancy, and equipment requirements.
Stop before the inspection becomes a repair. Do not:
- chip, scrape, or heat ice;
- handle refrigerant piping or controls;
- open sealed equipment compartments;
- remove electrical covers;
- cut or disconnect drain piping;
- bypass a float switch or other safety control;
- continue resetting a system that shuts down with water present;
- force water, air, chemicals, or tools into an unidentified pipe.
These limits are consistent with homeowner-safety guidance that advises against opening electrical panels, cutting drain lines, bypassing safety switches, and using harsh chemicals without an approved procedure (safe limits for homeowner checks).
Drain-cleaning advice requires particular caution. Online instructions recommend products and methods such as vinegar, bleach, tablets, water flushing, compressed air, or a wet/dry vacuum, but compatibility and access vary by drain material, trap, pump, equipment design, installer requirements, and warranty terms.
Before applying a product or suction method, consult the equipment manual, installer instructions, and warranty conditions. If the approved access point, product, and procedure are unclear, leave the line intact and request service. The supported conclusion is not that one cleaning method is always wrong; it is that no single method is suitable for every installation.
Your basic check is complete when you can report:
- exactly where the moisture appeared;
- whether it was dripping, sweating, pooling, or staining;
- when it occurred in the cooling cycle;
- whether conditions were unusually humid;
- whether ice, odor, weak airflow, failed cooling, or shutdowns occurred;
- what the accessible filter, pan, outlet, pump, and insulation looked like.
That information is more useful—and safer—than an unverified conclusion that the system needs refrigerant or a universal chemical flush.
When to stop troubleshooting and request professional service
Request urgent help when you find:
- water beside wiring, controls, motors, switches, receptacles, or electrical panels;
- active leakage into a ceiling or wall;
- substantial or spreading standing water;
- a visibly frozen coil area or iced refrigerant line;
- failed cooling combined with water or ice;
- repeated overflow;
- a system that repeatedly shuts down while water is present;
- a full pan with no safe, obvious way to contain the situation.
Turn the system off when it is safe to do so, but never reach through water or touch wet electrical equipment to accomplish that. Published guidance on standing water likewise recommends stopping operation because of electrical and building-damage concerns (when pooling water requires shutdown).
Other symptoms may not be immediate emergencies, but they warrant prompt scheduling:
- recurring drain restrictions;
- repeated discharge from a confirmed secondary outlet;
- musty odors;
- visible rust or corrosion;
- persistent duct or vent sweating;
- unexplained clamminess or high indoor humidity;
- weak or uneven airflow;
- stains that continue to grow;
- leakage that returns after the surface is dried;
- a pump that runs abnormally, fails to run, or repeatedly overfills.
Refrigerant, blower, electrical, pump, concealed-drain, drain-slope, and installation problems require qualified diagnosis because their symptoms overlap. A frozen coil could involve airflow, coil condition, blower operation, refrigerant conditions, or more than one issue. Condensation or icing alone cannot establish that refrigerant is low or leaking.
Before the technician arrives, record:
- the exact moisture location;
- weather and apparent humidity conditions;
- when in the cooling cycle it happens;
- whether water appears during or after operation;
- odors and visible ice;
- airflow or cooling changes;
- thermostat behavior;
- unexpected shutdowns;
- previous occurrences;
- recent filter, drain, duct, thermostat, or equipment work.
Useful contractor questions include:
- Is condensate following the intended drainage route?
- Is the primary pan intact, clean, and correctly positioned?
- Is there an auxiliary pan, and does it contain water?
- Are the drain slope and trap appropriate and unobstructed?
- Is a condensate pump present, and is it working?
- Is the float switch operating correctly or responding to a recurring fault?
- Is airflow across the evaporator coil within equipment requirements?
- Is there evidence of coil icing, and what measurements identify the cause?
- Is duct insulation continuous, correctly fitted, and dry?
- Could the water be coming from plumbing, rain intrusion, or another nearby source?
HVAC Lens describes its articles as general homeowner information rather than contractor advice. Equipment and drainage arrangements vary by home, climate, model, and installation, so significant repairs or system changes should be confirmed with a licensed professional, as stated in the HVAC Lens Terms & Conditions.
How to reduce the chance of recurring condensation problems
Prevention is easier to organize around four functions:
- preserve airflow;
- keep the intended drainage route open;
- limit humid-air contact with cold surfaces;
- catch developing problems early.
Preserve airflow
Check the filter according to its condition and the equipment or filter manufacturer’s instructions. Look for visible loading and airflow changes rather than treating replacement as a universal calendar event.
Keep supply and return openings unobstructed. If airflow remains weak with an appropriate clean filter and open vents, arrange professional evaluation instead of repeatedly adjusting vents or replacing filters. Recurring coil ice also needs diagnosis; allowing it to thaw and restarting the system does not correct the underlying cause.
Maintain the intended drainage path
Periodically inspect accessible drain outlets, pans, pump reservoirs, and surrounding materials. Visual checks are particularly valuable when equipment is installed in an attic, closet, or another location above finished rooms.
Learn which visible pipe is the normal outlet and whether the system has a secondary drain, auxiliary pan, pump, or float switch. Do not assume a safeguard exists merely because it is common in some installations.
Follow model- and installer-specific drainage instructions. There is no universal chemical flush, vacuum technique, or service frequency suitable for every system. Recurring restrictions indicate a need to inspect the line, slope, trap, pan, pump, and operating conditions—not merely to clear the outlet repeatedly.
Separate humid air from cold surfaces
Duct and refrigerant-line insulation should be continuous and appropriate for the installation. Pay attention to visible gaps, torn coverings, compressed areas, loose joints, and damp sections.
If insulation remains wet, has deteriorated, or has separated from the surface it is meant to protect, arrange an assessment. A technician can determine whether the material can remain in service, whether replacement is appropriate, and whether air leakage or another moisture source needs correction.
Humidity control is climate- and building-dependent. A basic humidity monitor can help you compare conditions when sweating occurs, but do not assume one target applies to every home. Persistent clamminess or surface condensation may involve equipment operation, ventilation, infiltration, duct conditions, or the building envelope.
Catch changes early
Look for new stains, rust, odors, pump noise, damp insulation, outlet changes, ice, or unexpected shutdowns.
Use this compact seasonal checklist:
- Filter: Is it visibly loaded, damaged, damp, or overdue under its instructions?
- Airflow: Are supply and return openings clear? Has airflow changed?
- Drain discharge: Does the designated outlet discharge during suitable cooling conditions?
- Pan or pump: Is there accessible standing water, rust, overflow, or abnormal pump behavior?
- Odors: Is there a persistent new musty smell near the unit or vents?
- Stains: Are marks appearing or growing on the equipment platform, ceiling, wall, or floor?
- Insulation: Is visible duct or line insulation intact and dry?
- Icing: Is any accessible line or cabinet area visibly iced?
- Shutdowns: Has the system stopped unexpectedly or required repeated resets?
Frequently asked questions
Is water dripping from the AC drain outside normal?
Yes. Water dripping from the designated outdoor condensate outlet can be normal while the AC is cooling, especially in humid conditions. It suggests that moisture collected at the evaporator coil may be following its intended drainage route.
The amount and frequency vary with humidity, runtime, equipment, and installation, so there is no universal normal drip count. Monitor for indoor leakage, ice, weak cooling, odors, or shutdowns, and make sure you are looking at the regular drain rather than a backup outlet.
Can a dirty air filter cause condensation or an AC water leak?
It can contribute indirectly. A heavily loaded filter may restrict airflow across the evaporator coil. Under some conditions, that can promote icing; when the ice thaws, the released water may exceed what the pan or drain can manage.
A dirty filter does not prove the cause of a leak. Drain restrictions, pan damage, pump failure, insulation problems, and installation issues can produce similar symptoms. Clean or replace the filter only as its instructions allow, and request service if ice, leakage, weak airflow, or poor cooling persists.
What does water dripping from a secondary AC drain line mean?
If the outlet is truly connected to a secondary drain, dripping may indicate that water is not leaving through the primary drainage route as intended. The primary line, pan, slope, trap, pump, or related drainage components may need inspection.
Not every system has a secondary drain, and outlet arrangements differ. Photograph the outlet and arrange prompt inspection rather than assuming its identity or forcing material through the piping.
Should I use vinegar or bleach to clear an AC condensate drain?
Do not assume either is universally appropriate. Compatibility depends on the equipment, drain materials, pump, trap, approved access point, installer requirements, and warranty terms. Bleach also requires careful handling and must never be mixed with other cleaning products.
Follow the model-specific manufacturer and installer instructions. If the approved product, concentration, access point, and procedure are unclear, do not improvise with chemicals, pressure, or suction. A recurring or inaccessible blockage should be handled by a qualified technician.
Should I turn off the AC if I find standing water?
Yes—if water is accumulating around the indoor unit, spreading into finished materials, appearing with ice, or approaching electrical components, turn the AC off when you can do so safely. Do not touch wet panels, wiring, switches, breakers, or other electrical equipment. Guidance for blocked condensate systems recommends professional service when water damage, electrical concerns, frozen coils, or persistent problems are present (blocked-condensate service thresholds).
Leave the system off if it repeatedly overflows or shuts down while water is present. A float switch may be preventing further leakage, and bypassing or repeatedly resetting it can defeat that protection.
The location-first rule is simple: normal AC condensate stays within a controlled route. Water on vents, ducts, floors, walls, ceilings, or outside the intended drainage system deserves attention.
Identify and photograph the location. Look for ice and performance changes. Inspect only accessible filters and drainage areas. Shut the system off when safe if water threatens electrical components or finished materials. Then give a qualified technician the documented pattern instead of guessing at a refrigerant leak or applying a one-size-fits-all drain treatment.